


Fingerprinting gathers data about a user's device—for example, information about the device user agent, screen resolution, installed fonts, time zone, language preferences, and device properties—and combines these elements to generate a unique fingerprint for each device. Applications can use these fingerprints to recognize devices even if the app cache or data is cleared.
Fingerprinting provides a more persistent and robust identification method than traditional identification methods like session tracking, HTTP cookies, and IP-based identification. Device characteristics create a unique fingerprint that is more reliable than cookies or IP addresses, which can change or be easily manipulated. This makes fingerprinting useful for identifying and blocking suspicious actions.
Integrating device fingerprinting into multifactor authentication (MFA) improves security, especially when you use fingerprinting to trigger MFA prompts when a user logs in from a different device. When a device's fingerprint aligns with the expected pattern, it strengthens the confirmation of a user's identity, enhancing overall authentication protocols.
In this article, you'll learn how to integrate device fingerprinting into a Flutter application using Fingerprint Pro Flutter SDK—a publicly available library for device fingerprinting that uses device attributes to generate a unique visitor identifier through a hashing process. You'll also set up a Python Flask web server to handle registration requests and perform fingerprint validations, and you'll learn how to use the Fingerprint Python Server API SDK to perform additional validations to ensure that the fingerprint is reliable.
Tutorial Overview and Prerequisites
In this tutorial, you'll build a Flutter application with sign-up and login screens. The application will generate a device fingerprint and send it to the backend server and user data for verification. If the sign-up is successful, the Flutter application will redirect the user to the logged-in user's home screen. If not, it will display the appropriate error message.
The backend verification will verify the fingerprint data and enforce rate limits to ensure that the same fingerprint cannot be used for more than five registrations within an hour.
Before starting, you'll need to prepare by doing the following:
- Install the Flutter dev environment.
- Install Python.
- Register for a free trial of Fingerprint Pro.
- Create a Fingerprint Server API key.
- Download and install ngrok.
Create a Flutter Application
To create a new Flutter application, execute the following command in your terminal:
flutter create fingerprint_flutter_sampleNote: Ensure you set up the flutter developer environment before executing the command above.
The code above generates a fingerprint_flutter_sample directory with the following structure:
├── fingerprint_flutter_sample
│   ├── android
│   ├── ios
│   ├── macos
│   ├── web
│   ├── lib
│   │   ├── main.dart
│   ├── pubspec.yaml
The main.dart file is the entry point of the Flutter application and can be used to define the user interface (UI) and business logic of the first screen.
Add Package Dependencies
Now, you need to add the Fingerprint Flutter plugin in your application to generate a visitor ID for users trying to register.
Add a dependency for fpjs_pro_plugin by updating pubspec.yaml as follows:
dependencies:
  flutter:
    sdk: flutter
  # add the following dependency
  fpjs_pro_plugin: ^2.1.1
You also need to make API calls to your backend service for login and registration endpoints. Add a dependency for the http package to make HTTP API calls as follows:
dependencies:
  ...
  # add this after other dependencies
  http: ^1.2.1
Finally, run the pub get command to install the package dependencies specified in pubspec.yaml:
flutter pub getIt will install the dependencies and update the pubspec.lock file with the resolved dependency versions.
Define Widgets in the App
Widgets in Flutter are pieces of reusable code that define the look and behavior of the components. In this section, you'll define widgets for user sign-up and login for your Flutter application.
Define the Sign-Up Widget
Your sign-up widget will contain a form with input fields and a button for user registration.
Create a signup.dart file in the lib directory and add the following content to it:
import 'package:flutter/material.dart';
import 'package:flutter/services.dart';
class SignupCard extends StatefulWidget {
State<SignupCard> createState() => _SignupCardState();
}
class _SignupCardState extends State<SignupCard> {
String _fullName = '';
String _username = '';
String _password = '';
String _visitorId = '';
String _requestId = '';
Future<void> handleSignup() async {
// sign up logic here
}
Widget build(BuildContext context) {
return Center(
child: Card(
margin: EdgeInsets.all(20.0),
child: Padding(
padding: EdgeInsets.all(16.0),
child: Column(
mainAxisSize: MainAxisSize.min,
children: <Widget>[
TextField(
decoration: InputDecoration(labelText: 'Full Name'),
onChanged: (value) => _fullName = value,
),
SizedBox(height: 10),
TextField(
decoration: InputDecoration(labelText: 'Username'),
onChanged: (value) => _username = value,
),
SizedBox(height: 10),
TextField(
decoration: InputDecoration(labelText: 'Password'),
onChanged: (value) => _password = value,
obscureText: true,
),
SizedBox(height: 20),
ElevatedButton(
onPressed: () async {
await handleSignup();
},
child: Text('Sign up'),
),
],
),
),
),
);
}
}Next, initialize Fingerprint Pro Flutter SDK in the sign-up widget and use it to generate the device fingerprint:
# add this import after the existing ones
import 'package:fpjs_pro_plugin/fpjs_pro_plugin.dart';
void initState() {
super.initState();
_initFingerprint();
}
void _initFingerprint() async {
await FpjsProPlugin.initFpjs('<YOUR_API_KEY>');
var deviceData = await FpjsProPlugin.getVisitorData();
_visitorId = deviceData.visitorId;
_requestId = deviceData.requestId;
}The code snippet above uses the getVisitorData method of the FpjsProPlugin plugin to generate the user's visitorId and requestId based on app and device characteristics.
When the Signup button is clicked, the handleSignup method is invoked. The handleSignup method calls the /register API endpoint for user registration and redirects the user to the logged-in screen if registration is successful. You will learn how to create a Python Flask application with login and registration endpoints in the next section. For now, update the method to the following:
# add these imports after the existing ones
import 'package:http/http.dart';
import 'logged_in.dart';
import 'dart:convert';

Future<void> handleSignup() async {
  try {
    if (_visitorId.isEmpty) {
      print('Visitor ID is null');
      return;
    }

    // call the signup API endpoint
    var request = MultipartRequest(
        'POST',
        Uri.parse(
            '<YOUR_BACKEND_SERVICE_APP_URL>/register'));
    request.fields.addAll({
      'username': _username,
      'password': _password,
      'full_name': _fullName,
      'visitor_id': _visitorId,
      'request_id': _requestId
    });

    StreamedResponse response = await request.send();

    var responseStr = await response.stream.bytesToString();
    final responseJson = json.decode(responseStr);
    if (responseJson['status'] == 200) {
      Navigator.push(
        context,
        MaterialPageRoute(builder: (context) => LoggedIn()),
      );
    } else {
      print("responseJson ${responseJson}");
      ScaffoldMessenger.of(context).showSnackBar(SnackBar(
        content: Text('Sign-up failed - ${responseJson['message']}'),
      ));
    }
  } on PlatformException catch (e) {
    print(e.message);
  }
}
Make sure to replace <YOUR_BACKEND_SERVICE_APP_URL> with your Flask application's URL once it is deployed.
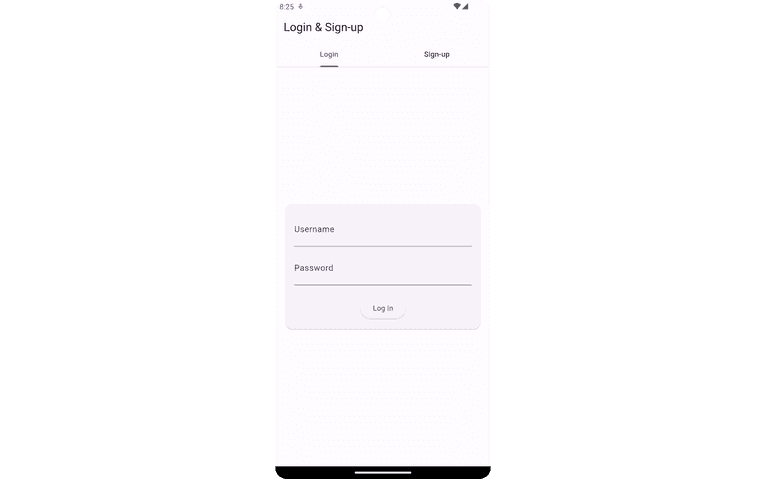
Define the Login Widget
Your login widget will contain a form with input fields and a button for user login.
Create the file login.dart in the lib directory and add the following content to it:
import 'package:flutter/material.dart';
import 'package:flutter/services.dart';
class LoginCard extends StatefulWidget {
State<LoginCard> createState() => _LoginCardState();
}
class _LoginCardState extends State<LoginCard> {
String _username = '';
String _password = '';
Future<void> handleLogin() async {
// login logic here
}
Widget build(BuildContext context) {
return Center(
child: Card(
margin: EdgeInsets.all(20.0),
child: Padding(
padding: EdgeInsets.all(16.0),
child: Column(
mainAxisSize: MainAxisSize.min,
children: <Widget>[
TextField(
decoration: InputDecoration(labelText: 'Username'),
onChanged: (value) {
setState(() {
_username = value;
});
},
),
SizedBox(height: 10),
TextField(
decoration: InputDecoration(labelText: 'Password'),
onChanged: (value) {
setState(() {
_password = value;
});
},
obscureText: true,
),
SizedBox(height: 20),
ElevatedButton(
onPressed: () async {
await handleLogin();
},
child: Text('Log in'),
),
],
),
),
),
);
}
}When the Login button is clicked, the handleLogin method is invoked. Update the method to the following:
# add these imports after the existing ones
import 'package:http/http.dart';
import 'logged_in.dart';
import 'dart:convert';

Future<void> handleLogin() async {
  try {
    ScaffoldMessenger.of(context).hideCurrentSnackBar();
    var request = MultipartRequest(
        'POST',
        Uri.parse(
            '<YOUR_BACKEND_SERVICE_APP_URL>/login'));
    request.fields.addAll({'username': _username, 'password': _password});

    StreamedResponse response = await request.send();

    var responseStr = await response.stream.bytesToString();
    final responseJson = json.decode(responseStr);
    if (responseJson['status'] == 200) {
      Navigator.push(
        context,
        MaterialPageRoute(builder: (context) => LoggedIn()),
      );
    } else {
      print("responseJson ${responseJson}");
      ScaffoldMessenger.of(context).showSnackBar(SnackBar(
        content: Text('Login failed - ${responseJson['message']}'),
      ));
    }
  } on PlatformException catch (e) {
    print(e.message);
  }
}
The handleLogin method calls the /login API endpoint for user login and redirects the user to the logged-in screen if login is successful.
Define the Logged-in Widget
Your logged-in widget will contain a welcome message indicating the user has logged in.
Create the file logged_in.dart in the lib directory and add the following content to it:
import 'package:flutter/material.dart';
class LoggedIn extends StatelessWidget {
Widget build(BuildContext context) {
return Scaffold(
appBar: AppBar(
title: Text('Logged In'),
),
body: Center(
child: Text('You are logged in!'),
),
);
}
}Update the Main Widget
Your main widget will contain a tab view with sign-up and login widgets.
Update the main.dart file in the lib directory with the following content:
import 'package:flutter/material.dart';
import 'login.dart';
import 'signup.dart';
void main() {
runApp(const MainApp());
}
class MainApp extends StatelessWidget {
const MainApp({super.key});
// This widget is the root of your application.
Widget build(BuildContext context) {
return MaterialApp(
debugShowCheckedModeBanner: false,
home: DefaultTabController(
length: 2,
child: Scaffold(
appBar: AppBar(
title: Text('Login & Sign-up'),
bottom: TabBar(
tabs: [
Tab(text: 'Login'),
Tab(text: 'Sign-up'),
],
),
),
body: TabBarView(
children: [
LoginCard(),
SignupCard(),
],
),
),
),
);
}
}Define APIs for User Registration
In the previous section, you defined sign-up and login screens that invoke APIs for user registration and login. For these operations, you need a backend application that exposes HTTP API endpoints.
The backend will also be used to verify the uniqueness of the fingerprint data and perform additional server validations using the Fingerprint Python Server API SDK. Your Flutter application will call these endpoints for login and sign-up.
You can use any programming language or framework for the backend. This tutorial uses Python Flask and a SQLite database to store user information.
Create a New Project
To create a new Flask application, execute the following commands in your terminal:
mkdir fingerprint-flask-server
cd fingerprint-flask-server
Add Package Dependencies
To add package dependencies, create the file requirements.txt in the project's root and add the following content:
Flask
argon2-cffi
gunicorn
fingerprint-pro-server-api-sdkFlaskandgunicornare required to create a Python web server.argon2-cffiis required for password hashing.fingerprint-pro-server-api-sdkis to perform additional fingerprint validation checks on the server.
Define a Web Server
To create a simple web server, create the file app.py and add the following code snippet to it:
from flask import Flask, jsonify, request, g
import sqlite3
import argon2

app = Flask(__name__)

DATABASE = 'database.db'
ph = argon2.PasswordHasher()

@app.route('/')
def index():
    return 'Welcome to Fingerprint API'

def get_db():
    db = getattr(g, '_database', None)
    if db is None:
        db = g._database = sqlite3.connect(DATABASE)
    return db

@app.teardown_appcontext
def close_connection(exception):
    db = getattr(g, '_database', None)
    if db is not None:
        db.close()

if __name__ == '__main__':
    port = 5001
    app.run(port=port)
The code snippet above creates an instance of the Flask app and defines the default index route. It also creates utility functions to get (get_db) and close (close_connection) SQLite database connections.
Register Route
At home or in a public place, multiple people may try to legitimately create accounts through the same devices, resulting in those accounts showing the same visitor ID. However, if your server receives too many registration requests using the same visitor ID in a short period, it might indicate user registration abuse.
To handle such scenarios, you can rate limit the number of sign-ups from the same visitor ID in a specified time duration. For illustrative purposes, you will limit it to five sign-ups in an hour from the same visitor ID before throwing an error.
Moreover, you can perform additional server validations using the Fingerprint Python Server API SDK. When the frontend Flutter SDK generates a visitor_id, the Fingerprint server stores a corresponding event with additional metadata. You can use the get_event API to fetch the fingerprint event based on requestId and use it for the following purposes:
- Verify that the
fingerprint(ievisitor_id) obtained in the form is the same as what came from the visitor API. - Check the time difference between the form request and the identification event.
- Validate the confidence score of the generated
fingerprint.
In this tutorial, you'll define a /register endpoint for user registration that performs fingerprint validation and persists the user to the SQLite database. The /register route will receive the user data from the frontend Flutter application.
Add the following code snippet to the app.py file to add the /register route:
import fingerprint_pro_server_api_sdk
from fingerprint_pro_server_api_sdk.rest import ApiException
import time

# init variables and SDK after the import statements in the app.py file
min_confidence = 0.5
max_request_lifespan = 60 * 5 # 5 minutes
visitor_id_rate_limit = 5 # 5 sign-ups allowed with same visitor ID every hour

# init the server API SDK
configuration = fingerprint_pro_server_api_sdk.Configuration(api_key="<YOUR_SERVER_API_KEY>")
api_instance = fingerprint_pro_server_api_sdk.FingerprintApi(configuration)

@app.route('/register', methods=['POST'])
def register():
    try:
        if request.method == 'POST':
            username = request.form['username']
            password = request.form['password']
            full_name = request.form['full_name']
            visitor_id = request.form['visitor_id']
            request_id = request.form['request_id']

            hashed_password = ph.hash(password)

            cur = get_db().cursor()

            # check if username already exists
            cur.execute('SELECT * FROM users WHERE username = ?', (username,))
            user = cur.fetchone()

            if  user:
                return jsonify({'message': 'Username already exists', 'status': 400})

            if validate_fingerprint(visitor_id=visitor_id, request_id=request_id):
                # Disclaimer: This is a simple example. For production, you should use an ORM or stronger input validation practices
                cur.execute('INSERT INTO users (username, password, full_name, visitor_id) VALUES (?, ?, ?, ?)', (username, hashed_password, full_name, visitor_id))
                get_db().commit()

                return jsonify({'message': 'User registered successfully', 'status': 200})
        else:
            return jsonify({'message': 'Invalid request', 'status': 400})
    except Exception as e:
        return jsonify({'message': str(e), 'status': 400})

def validate_fingerprint(visitor_id, request_id):
    if request_id:
        try:
            # Get the fingerprint from the request_id
            event = api_instance.get_event(request_id)

            event_json = event.to_dict()
            identification = event_json['products']['identification']['data']

            server_visitor_id = identification['visitor_id']
            identification_timestamp = identification['timestamp'] / 1000
            confidence = identification['confidence']['score']

            # Check if the fingerprint is valid
            time_now = int(time.time())

            if time_now - identification_timestamp > max_request_lifespan:
                raise Exception('Fingerprint request expired.')

            if server_visitor_id != visitor_id:
                raise Exception('Fingerprint forgery detected.')

            if confidence < min_confidence:
                raise Exception('Fingerprint confidence too low.')
        except ApiException as e:
            print("Exception when calling FingerprintApi->get_event: %s\n" % e)
            raise Exception('Invalid fingerprint.')

    if visitor_id:
        # check the rate limit

        cur = get_db().cursor()
        # check the number of times the visitor_id appears in the database in the last 1 hour
        visitor_id_count = cur.execute('SELECT COUNT(*) FROM users WHERE visitor_id = ? AND created_at > datetime("now", "-1 hour")', (visitor_id,)).fetchone()[0]

        if visitor_id_count >= visitor_id_rate_limit:
            raise Exception('Fingerprint rate limit exceeded.')

    return True
The code snippet above initializes the Fingerprint Server API SDK, uses the get_event method to fetch identification metadata, and uses it to perform the additional server validations discussed above. It throws an Exception if any of the validations fails.
It checks the number of user sign-ups with the same visitor ID in the last hour to enforce rate limiting. It throws an Exception if the limit is exceeded.
The API returns a 400 status code if the username is not unique or if fingerprint validation fails.
Remember to update the code snippet with the server API key you created at the start of this tutorial.
Login Route
The /login route receives the user credentials from the frontend Flutter application and returns user information if the credentials are valid. To add the /login route, add the following code snippet at the end of the app.py file:
@app.route('/login', methods=['POST'])
def login():
    if request.method == 'POST':
        username = request.form['username']
        password = request.form['password']

        cur = get_db().cursor()

        cur.execute('SELECT * FROM users WHERE username = ?', (username,))

        user = cur.fetchone()

        if user:
            user_password = user[2]
            if ph.verify(user_password, password):
                full_name = user[3]
                return jsonify({'message': 'Login successful', 'full_name': full_name, 'status': 200})

        return jsonify({'message': 'Invalid credentials', 'status': 400})
    else:
        return jsonify({'message': 'Invalid request', 'status': 400})
Defining Database Schema
You must define your user database's schema before using the login and registration APIs. The schema describes the structure of the tables, indexes, and triggers contained within the database. This example uses a single users table to persist user details and visitor_id.
You can define the schema of the users table using the CREATE TABLE command, specifying the columns and their attributes. Create a file named db_migrate.py in the root of the project and add the following code snippet to it:
import sqlite3

DATABASE = 'database.db'

con = sqlite3.connect(DATABASE)

cur = con.cursor()

# create users table

cur.execute('''
CREATE TABLE IF NOT EXISTS users (
    id INTEGER PRIMARY KEY AUTOINCREMENT,
    username TEXT NOT NULL,
    password TEXT NOT NULL,
    full_name TEXT NOT NULL,
    visitor_id TEXT NOT NULL,
    created_at TIMESTAMP DEFAULT CURRENT_TIMESTAMP
)
''')

con.commit()
con.close()
To perform the DB migration, execute the following command in your terminal:
python db_migrate.pyIt will create the file database.db in the root of the project containing the users table.
Run and Deploy the Flask App
Run your Python app locally by executing the following command in the terminal:
python app.pyExecuting the command will start the Flask application on http://127.0.0.1:5001. If you want to test your Flutter application on an emulator or a physical device, you would need a remote URL for the API. You can generate a web-hosted URL for the locally running Flask server using HTTP tunneling with ngrok using the following command:
ngrok http 5001This command will output as shown below:
Session Status                online
--- Output Omitted ---
Forwarding                    https://fba5-2601-602-9700-5a20-8c22-c953-7c10-1b6.ngrok-free.app -> http://localhost:5001
--- Output Omitted ---
The output contains a generated web URL that can be accessed through any device.
In the login.dart and signup.dart widgets of your Flutter application, replace YOUR_BACKEND_SERVICE_APP_URL with this ngrok web URL.
Note: You could also deploy the API using a cloud platform like Heroku by following this guide.
Application Demo
Now that you've built your Flutter application and integrated the Fingerprint SDK into it, run it using the following command:
flutter run lib/main.dartMake sure to have an Android or iOS device or emulator connected to your computer if you want to run the app on a mobile device. If no mobile device (or emulator) is connected, you will be prompted to run the app as a desktop or web app.
Click on the sign-up tab to open the sign-up form.
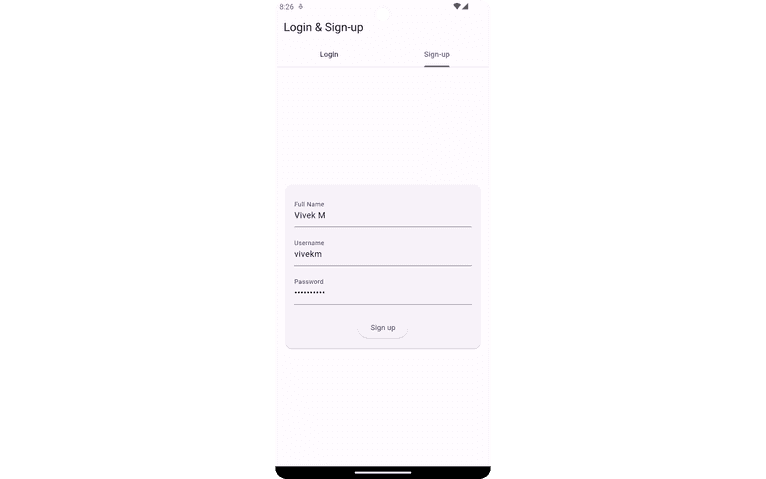
Complete the form and click Sign up. If the sign-up is successful, it will redirect you to the logged-in user page. You can verify successful sign-up by logging in to the application using the same credentials.
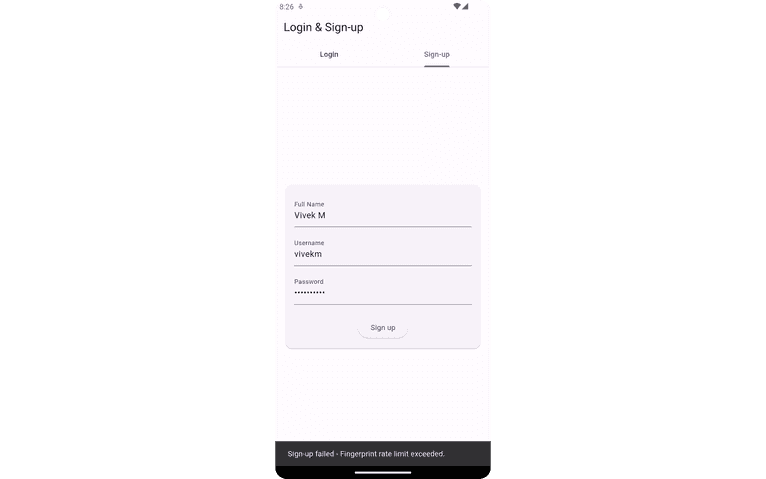
Next, log out and reopen the sign-up tab. Attempt to sign up with a different username and email. As expected, the sign-up will succeed even though the visitor ID is the same because the rate limit has not been exceeded yet. If you log out and repeat the procedure five more times, you will receive a "rate limit exceeded" error.
You can verify whether the additional server validations are working by navigating to the sign-up tab, completing the sign-up form, and waiting for longer than the life span defined in the max_request_lifespan variable—five minutes, in this case—before clicking on the sign-up button.

You can find the complete app's source code as well as the Flask app server on GitHub.
Conclusion
This tutorial showed you how to use the Fingerprint Pro Flutter SDK to generate device fingerprints in a Flutter application to prevent user abuse.
The Fingerprint Pro Flutter SDK generates a visitor identifier using device characteristics with industry-leading accuracy. You can also combine it with Fingerprint's HTTP Server API or Fingerprint Python Server API SDK to perform additional checks in the backend.
Fingerprint's advanced matching techniques ensure reliable deduplication of identical device users. To get started, sign up for a free trial.
Frequently Asked Questions
What is device fingerprinting?
Device fingerprinting is a technique used to uniquely identify devices by examining their characteristics. This can involve information such as device model, operating system, and device capabilities to create a unique identifier for the device.
What are the benefits of adding device fingerprinting to your app?
Integrating device fingerprinting into your app can boost security by uniquely identifying devices and preventing fraud by comparing device fingerprints with their related activity. Additionally, it can enhance user experience by enabling personalized settings without needing to log in.
How can device fingerprinting enhance user authentication?
Device fingerprinting creates a unique identifier from the device's hardware and software attributes, helping detect unrecognized devices. This allows for more accurate user identification and can trigger additional verification steps when anomalies are detected, thus preventing unauthorized access and improving overall app security.


