


Fraudulent behavior among website visitors is not just an annoyance; it can be outright damaging for website owners and other visitors. Consider these three common patterns that might indicate fraudulent behavior, such as account takeovers or mass creation of fake accounts:
- A user logs in from an unknown device.
- An account is being accessed from more different devices than usual.
- A single device creates multiple accounts in short succession.
Browser fingerprinting is an effective method for fighting potentially malicious actions like these. A browser fingerprint is gathered by applying several techniques for detecting unique aspects of a browser or the device it runs on, such as subtle differences in how browsers render images, fonts, or audio due to varying hardware and software configurations.
This article examines the third pattern in the list above: a malicious actor attempts to create multiple fake accounts from the same device in short succession. If multiple sign-ups happen on the same device with a reasonable amount of time between them, they should be regarded as valid. For example, think of family members who use the same computer to sign up for the service. However, if multiple signups occur quickly, this can be an indication of fraud.
You'll learn how to use Go to set up a web app that serves a sign-up page and captures the browser fingerprint along with the sign-up data. If the fingerprint of a sign-up is the same as the fingerprint of an existing account that was created less than a minute ago, the app will refuse to register the new user. You'll do this by integrating the Fingerprint Pro JS library into the sign-up page and using Fingerprint Pro to identify a device with industry-leading accuracy.
You'll end up with a minimal Go web server that serves a sign-up page and determines the user's unique device ID before saving the user or rejecting the sign-up.
Preparing the Project
Before getting started, you need to set up a few things.
Sign Up for a Fingerprint Pro Trial
This project uses the Fingerprint Pro service, which is much more accurate than the open source edition. You can sign up for a fourteen-day trial (no credit card required).
Obtain API Keys
To get API keys for this project, log in to the Fingerprint Pro dashboard and navigate to App Settings > API Keys. Generate a secret API key, which the backend code will use, and a public API key, which can be exposed to frontend code.
Save both keys safely on your system.
Set Up the Go Project
At this point, you have two options: either go through the article and copy and paste the code as you go, or clone the project repository.
Note that the minimum code is presented here to demonstrate fingerprinting. The code in the repository adds a home page, a navigation bar, and CSS styling.
If you decide to build the code from the article, your final file layout will look as follows:
.
├── go.mod
├── go.sum
├── internal
│   ├── fingerprint
│   │   └── fingerprint.go
│   └── store
│       └── store.go
├── main.go
├── response.gotpl
├── signup.go
└── signup.gotpl
Start by creating a new directory, cd into it, and run the following code:
go mod init your/unique/module/path/and/nameYou'll add more code as you advance through the tutorial.
Managing Users in the Database
Let's start with setting up the storage, which you'll need later when implementing the sign-up process.
If a user signs up successfully, their login credentials, visitor ID, and sign-up timestamp will be stored in a database—in this case, an SQLite database. SQLite is an embedded database that does not require installing and setting up a separate server. The package modernc.org/sqlite is a full port of SQLite to Go, which means that you don't even require an SQLite library.
Put the code in this section into the file internal/store/store.go.
The core of the user store is this struct:
package store

import (
    "fmt"
    "time"
    "database/sql"
    _ "modernc.org/sqlite"
)

type Users struct {
	db *sql.DB
}
You're using a struct instead of a plain database object to be able to add a few methods to it. The struct also helps to abstract the database away from the application logic.
The first method to add is NewUsers(), which opens the user database and creates a user table if it doesn't exist. It errors out if the database cannot be opened or the create table statement fails. (Add this to store.go.)
func NewUsers(path string) (*Users, error) {
	db, err := sql.Open("sqlite", path)
	if err != nil {
		return nil, fmt.Errorf("openDB: %w", err)
	}

	err = createTable(db)
	if err != nil {
		return nil, fmt.Errorf("openDB: %w", err)
	}

	return &Users{db: db}, nil
}
To create the table, NewUsers() calls the function CreateTable, which you can define as follows:
func createTable(db *sql.DB) error {
	sqlStmt := `create table if not exists users(
   	email text not null unique,
   	signup_fingerprint text,
	timestamp text
   );
   `
	_, err := db.Exec(sqlStmt)
	if err != nil {
		return fmt.Errorf("createTable: %w", err)
	}

	return nil
}
You may have noticed that the database table does not contain a password field. This is no oversight. The code will be as simple as possible, and a password field is not required to prove the concept. You can add a password field if you'd like to, with code for hashing, salting, and peppering the password before storing it in the database.
Now add the second method, AddUser(), to store.go. AddUser() does what it says—it adds a user to the database. More specifically, it adds a record with email, visitor ID, and the current date and time.
SQLite has no datetime data type, but you can use time.Format() to generate a time string. In the function Check() further below, you can then use time.Parse() to turn the string back into a time value.
func (u *Users) Add(email, visitorId string) (status string, err error) {
	timestamp := time.Now().Format(time.RFC3339)
	sqlStmt := `insert into users(email, signup_fingerprint, timestamp) values (?, ?, ?)`
	_, err = u.db.Exec(sqlStmt, email, visitorId, timestamp)
	if err != nil {
		if err.Error()[0:17] == "constraint failed" {
			return "You already have signed up", nil
		}
		return "", fmt.Errorf("Users.Add: %w", err)
	}

	return "Thank you for signing up!", nil
}
Next, write a function Check() that returns (true, nil) if another user already has signed up on the same device within the last minute:
func (u *Users) Check(visitorId string) (recentLogin bool, err error) {
	var signupTime string

	err = u.db.QueryRow(`select timestamp from users
		where signup_fingerprint = ?
		order by timestamp desc limit 1`, visitorId).Scan(&signupTime)
	if err == sql.ErrNoRows {
		// no previous signup for this fingerprint
		return false, nil
	}
	if err != nil {
		return false, fmt.Errorf("Users.Check: %w", err)
	}

	st, err := time.Parse(time.RFC3339, signupTime)
	if err != nil {
		return false, fmt.Errorf("Users.Check: %w", err)
	}
	if time.Since(st) < time.Minute {
		return true, nil
	}
	return
}
Finally, you need a method to let Users clients close the Users store:
func (u *Users) Close() error {
	return u.db.Close()
}
Setting Up the Sign-Up Page
The user database will be populated from a sign-up page, where new users can enter their email. To fight fraud, you'll use the Fingerprint Pro script on this page to generate a unique device fingerprint. However, the page does not contain the actual script. It uses the JavaScript agent script to load the Fingerprint Pro script from a URL of the form:
https://fpjscdn.net/v3/PUBLIC_API_KEYYou can use a Go template to generate this URL dynamically with your API key appended. Create a file named signup.gotpl (in the root directory of the project) and add the HTML code below to it:
<!doctype html>
<html>
  <head>
    <script>
      const fpPromise = import('https://fpjscdn.net/v3/{{ . }}').then((FingerprintJS) => FingerprintJS.load())

      fpPromise
        .then((fp) => fp.get())
        .then((result) => {
          console.log(result.requestId, result.visitorId, result.visitorFound)

          // Store the request and visitor IDs in the hidden form fields
          document.getElementById('requestId').value = result.requestId
          document.getElementById('visitorId').value = result.visitorId
        })
    </script>
  </head>
</html>
Here is how it works: The {{ . }} construct in the HTML template below is a placeholder. The HTTP server code that you'll create later will substitute this placeholder with the actual public key.
Once the Fingerprint Pro script is loaded, it calculates a unique visitorId value from various attributes of the browser, operating system, and hardware. For test purposes, you can write the request ID and the visitor ID to the browser console.
The two document.getElementById lines pass the request ID and the visitor ID to hidden fields in the subscription form. This way, the two values can be sent to the server without any effort.
The body of the page is a simple sign-up form. (This code also goes into signup.gotpl.) The only nonstandard parts are the two hidden fields for request ID and visitor ID:
<body>
	<main>
		<form action="/signup" method="POST">
			<h1>Sign Up</h1>
			<label for="email">Email:</label>
			<input type="email" id="email" name="email" autocomplete="email" required>

			<input name="visitorId" id="visitorId" value="" hidden>
			<input name="requestId" id="requestId" value="" hidden>

			<input type="submit" value="Sign Up">
		</form>
	</main>
</body>
</html>
Adding Server-side Validations
The sign-up form sends the unique request ID and visitor ID to the server. Here, we can test if the visitor ID already exists in the database. But there is more we can do. The Fingerprint Go SDK delivers additional information about a specific request or visitor.
As an example, let's query the Fingerprint Pro service for more details about the current request.
The below code for the package fingerprint contains two functions.
New()creates a new SDK client.Check()takes a request ID and prints theBotdandIdentificationattributes to the terminal.
Add this code, which you'll call from the HTTP handler that processes the form, to internal/fingerprint/fingerprint.go:
package fingerprint

import (
	"context"
	"encoding/json"
	"fmt"
	"log"
	"os"
	"strings"

	"github.com/fingerprintjs/fingerprint-pro-server-api-go-sdk/v5/sdk"
)

type Client struct {
	API    *sdk.APIClient
	Cfg    *sdk.Configuration
	APIKey string
}

func New() *Client {
	cfg := sdk.NewConfiguration()
	client := sdk.NewAPIClient(cfg)

	// Default region is sdk.RegionUS
	if strings.ToLower(os.Getenv("FINGERPRINT_REGION")) == "eu" {
		cfg.ChangeRegion(sdk.RegionEU)
	}
	if strings.ToLower(os.Getenv("FINGERPRINT_REGION")) == "ap" {
		cfg.ChangeRegion(sdk.RegionAsia)
	}

	return &Client{
		API:    client,
		Cfg:    cfg,
		APIKey: os.Getenv("FINGERPRINT_SECRET_KEY"),
	}
}

func (c *Client) Validate(requestId, visitorId string) (passed bool, err error) {

	// Configure authorization, in our case with API Key
	auth := context.WithValue(context.Background(), sdk.ContextAPIKey, sdk.APIKey{
		Key: c.APIKey,
	})

	log.Printf("Checking request %s with API key %s in region %s\n", requestId, c.APIKey, c.Cfg.GetRegion())

	response, httpRes, err := c.API.FingerprintApi.GetEvent(auth, requestId)

	// See all the data that you can run verifications against
	r, _ := json.MarshalIndent(response, "", "\t")
	log.Printf("%v\n", string(r))

	if err != nil || httpRes.StatusCode != 200 {
		return false, fmt.Errorf("FingerprintApi.GetEvent: HTTP %d: %w\n", httpRes.StatusCode, err)
	}

	// Compare the fingerprints, to detect if the fingerprint received from the browser has been tampered with

	if response.Products.Identification.Data.VisitorId != visitorId {
		return false, fmt.Errorf("fingerprint mismatch: expected %s, got %s\n", visitorId, response.Products.Identification.Data.VisitorId)
	}

	return true, nil
}
Processing the Form
The following function creates and registers the HTTP handler that processes the sign-up form. The form sends a POST request to /signup with all field data, including the two hidden fields.
Put this code into a new file called signup.go in the root directory:
package main
import (
"bytes"
"<your-module-path>/internal/fingerprint"
"<your-module-path>/internal/store"
"log"
"net/http"
"text/template"
)
func setSignupHandler(users *store.Users, tmplResponse *template.Template) {
// Define and register the handler for the signup form
http.HandleFunc("/signup", func(w http.ResponseWriter, r *http.Request) {
if r.Method != "POST" {
http.Error(w, "Invalid request method", http.StatusMethodNotAllowed)
return
}
email := r.FormValue("email")
visitorId := r.FormValue("visitorId")
requestId := r.FormValue("requestId")
log.Printf("Email: %s, Visitor ID: %s\n", email, visitorId)
// Check if the visitor ID already exists in the database
recentSignup, err := users.Check(visitorId)
if err != nil {
log.Printf("/signup: check visitor ID: %s\n", err)
http.Error(w, "Internal server error", http.StatusInternalServerError)
return
}
msg := ""
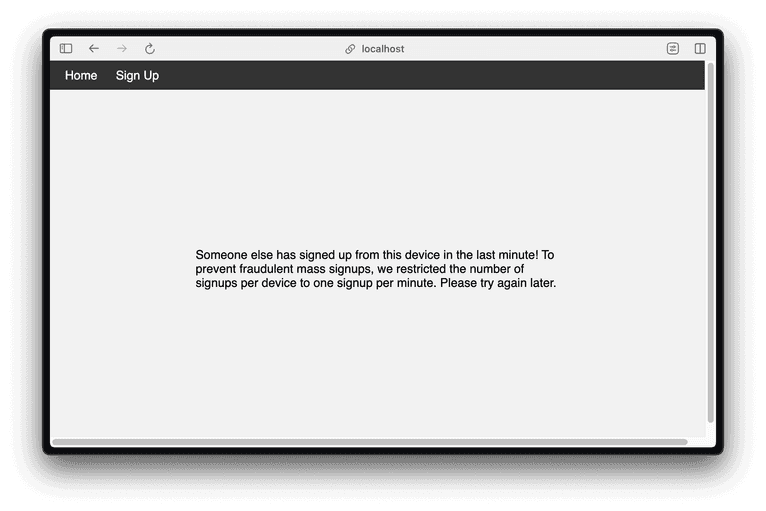
if recentSignup {
msg = "Someone else has signed up from this device in the last minute! To prevent fraudulent mass signups, we restricted the number of signups per device to one signup per minute. Please try again later."
} else {
// Add the user to the database
msg, err = users.Add(email, visitorId)
if err != nil {
log.Printf("/signup: add user: %s\n", err)
http.Error(w, "Internal server error", http.StatusInternalServerError)
return
}
}
// Get additional client information through the Go SDK
log.Printf("Server-side check for request ID %s\n", requestId)
fp := fingerprint.New()
success, err := fp.Validate(requestId, visitorId)
if err != nil {
log.Printf("/signup: validate fingerprint: %s\n", err)
http.Error(w, "Internal server error", http.StatusInternalServerError)
return
}
if !success {
msg = "Error verifying the signup attempt. Please try again."
}
// Send the response (either "thank you" or "you already signed up")
w.Header().Add("Location", "/response")
var response bytes.Buffer
err = tmplResponse.ExecuteTemplate(&response, "response", msg)
if err != nil {
log.Printf("/signup: execute template: %s\n", err)
http.Error(w, "Internal server error", http.StatusInternalServerError)
return
}
_, err = w.Write(response.Bytes())
if err != nil {
log.Printf("/signup: write response: %s\n", err)
http.Error(w, "Internal server error", http.StatusInternalServerError)
return
}
})
}Sending the Response
The form handler will send the response to a new page.
Create the file response.gotpl with the following code in it to define a simple response page:
<!doctype html>
<html>
  <head></head>

  <body>
    <nav>
      <a href="/signupform">Sign Up</a>
    </nav>

    <main>{{ . }}</main>
  </body>
</html>
Wiring Everything Up
Finally, you're now going to fill the file main.go with the code that sets up and runs the HTTP server.
Imports and File Embeddings
The first part that goes into main.go are the package, import, and variable declarations. Be sure to replace <your-module-path> in the import block with the actual module path listed in your go.mod file.
package main

import (
	"bytes"
	_ "embed"
	"fmt"
	"log"
	"net/http"
	"os"
	"text/template"

	"<your-module-path>/internal/fingerprint"
	"<your-module-path>/internal/store"

	"github.com/joho/godotenv"
)

// embed HTML and CSS files
var (
	//go:embed signup.gotpl
	signupTpl string

	//go:embed response.gotpl
	responseTpl string
)
Note the comments above each variable declaration. These comments are go directives that advise the go command to fill those variables from the files specified in the comments. After compiling, the variable signupTpl will hold the contents of signup.gotpl and responseTpl will contain the contents of response.gotpl.
run() Function
The function run() does all the work of initializing and running the HTTP server. Add this function to main.go:
func run() error {
	// (1) Load environment variables
	err := godotenv.Load()
	if err != nil {
		return fmt.Errorf("load .env: %w", err)
	}

	// (2) Connect to the database
	users, err := store.NewUsers(os.Getenv("FINGERPRINT_DATABASE_PATH"))
	if err != nil {
		return fmt.Errorf("open database: %w", err)
	}
	defer users.Close()

	// (3) signup.gotpl is a Go template. Map the environment variable FINGERPRINT_PUBLIC_KEY to the "{{ . }}" placeholder in the template.
	tmplSignup := template.Must(template.New("signup").Parse(signupTpl))
	var signup bytes.Buffer
	// (4) Insert the public API key into the template
	err = tmplSignup.Execute(&signup, os.Getenv("FINGERPRINT_PUBLIC_KEY"))
	if err != nil {
		return fmt.Errorf("execute template: %w", err)
	}

	// (3 cont'd) parse response.gotpl
	tmplResponse := template.Must(template.New("response").Parse(responseTpl))

	// (5) Define and register handlers for the signup page, and signup request, and response page

	http.HandleFunc("/signupform", func(w http.ResponseWriter, r *http.Request) {
		_, err := w.Write(signup.Bytes())
		if err != nil {
			log.Printf("serve signup form: %s\n", err)
			http.Error(w, "Internal server error", http.StatusInternalServerError)
			return
		}
	})

	setSignupHandler(users, tmplResponse)

	// Start the server
	port := os.Getenv("FINGERPRINT_LOCAL_PORT")
	log.Printf("Sign up at http://localhost:%s/signupform\n", port)
	err = http.ListenAndServe("127.0.0.1:"+port, nil)
	if err != nil {
		return fmt.Errorf("ListenAndServe: %w\n", err)
	}

	return nil
}
This code snippet is quite long, but the main steps are numbered in the comments and explained here by number:
- Load environment variables from an .env file into the process environment, where
os.Getenv()can transparently read them. - Open the user store, a.k.a. database.
- Parse the sign-up and response templates.
- Execute the sign-up template. This bakes the public API key into the resulting HTML page.
- Define the HTTP handlers for the sign-up page and the form request. The handler for the form processing is omitted here as we discussed this handler earlier.
- Start the HTTP server.
http.ListenAndServe()blocks forever unless a severe error happens.
Finally, add the function main() to main.go. This function doesn't have much to do. It calls run() and logs any error that run() might return. (Side note: log.Fatalf() calls os.Exit(1) to signal the calling shell an error condition.)
func main() {
	err := run()
	if err != nil {
		log.Fatalf("%s\n", err)
	}
}
Doing a Test Run
Your project is now ready to be run.
Be sure to disable any ad blockers on your system. Alternatively, you can circumvent ad blockers by adding a proxy server to the Go app that forwards client requests to Fingerprint. This way, the sign-up page can request all scripts through the Go app. Ad blockers consider this traffic as safe.
Creating a Configuration File
The demo app is configured via environment variables that can be set through an environment file. Before starting the server, create an .env file in the directory where you run the server and add this code to it:
FINGERPRINT_SECRET_KEY=insert-secret-api-key-here
FINGERPRINT_PUBLIC_KEY=insert-public-api-key-here
FINGERPRINT_DATABASE_PATH=users.sqlite
FINGERPRINT_REGION=
FINGERPRINT_LOCAL_PORT=8787
Remember to replace these values:
- The secret API key for the Fingerprint server that you generated in the dashboard
- The public API key for the Fingerprint server
- The server region: If unset, the default is "us". Set it to "eu" if you selected your region as Europe when you signed up or "ap" if you chose the Asia Pacific region.
Optionally, you can choose a different port and a different path to the user database.
Running the Server
Ensure you have run the following to update the dependencies.
go mod tidyThe tidy command automatically downloads all missing dependencies into the local module cache.
You can now call the following command in the project's root directory.
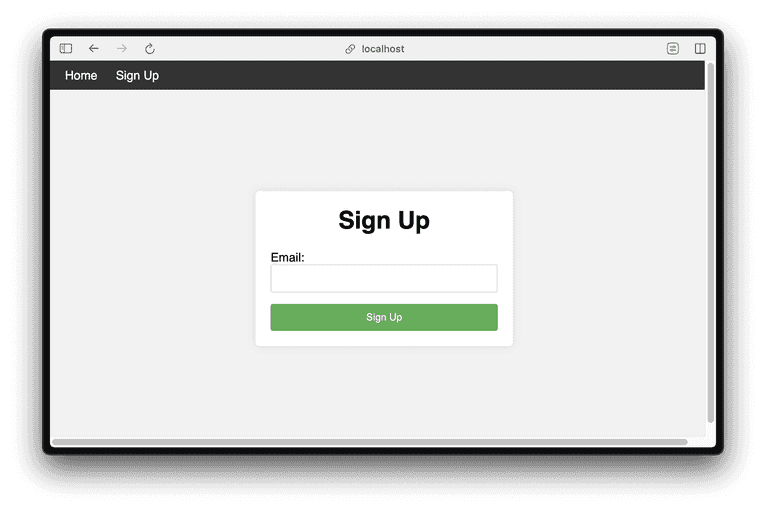
go run .You should see the server announcing the sign-up URL. Open https://localhost:8787/signupform (or whichever port number you've set) to see the sign-up page.
The following screenshots are made with the code from the repository, which includes navigation and CSS styling.
Enter an arbitrary email address and click Sign Up.
The first time you do this, you'll see a thank-you page.
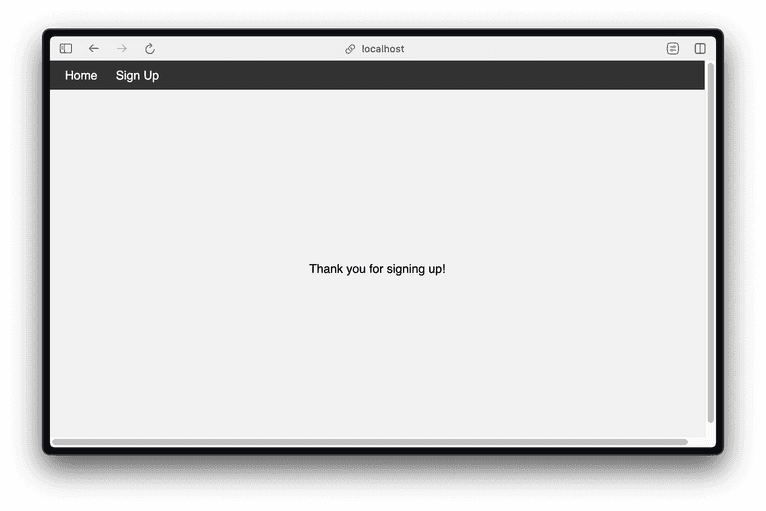
Hit the browser back button and sign up again using a different email address and password. The server will respond with a page saying that you have already signed up.
In the shell where the server runs, you'll see an output like this:
Email: quack@duck, Visitor ID: 1SGotR4LC768ewzjAlod
Server-side check for request ID 1711477650906.YcWkso
Checking request 1711477650906.YcWkso with API key S6QY1hUF40w9OX9qQyHh in region eu
2024/03/26 19:27:35 {
        "products": {
                "identification": {
                        "data": {
                                "requestId": "1711477650906.YcWkso",
                                "browserDetails": {
			(rest of JSON output omitted for brevity)
The JSON output from the server-side API call contains a wealth of information you can use to validate a request.
Protect Yourself and Your Legitimate Users
In this article, you've learned how to set up a fraud-resistant sign-up flow with Go and Fingerprint Pro. As you've seen, it takes only a few extra lines of script and HTML to embed the Fingerprint Pro script into a sign-up form to generate unique fingerprints of a browser/device combination. These fingerprints are valid across sessions as long as the same browser and device are used.
Fingerprinting not only requires little additional effort; it also adds no friction to legitimate users but results in a significant increase in security for your services and your users.
If you want to learn more about fingerprinting, you can star, follow, or fork the Fingerprint GitHub project or talk to a Fingerprint team member for more information.
Frequently Asked Questions
What is browser fingerprinting?
Browser fingerprinting is a method to uniquely identify website users by analyzing details about their web browsers to generate an identifier. This information can include details like browser version, screen resolution, and installed fonts to uniquely identify a user's device.
What are the benefits of adding browser fingerprinting to your app?
Adding browser fingerprinting to your app can enhance security by detecting and preventing fraudulent activities. It can also be used to improve user experience by enabling personalized settings without requiring logins.
Why use browser fingerprinting over cookies?
Browser fingerprinting provides a much more persistent form of visitor identification than cookies, which users can easily clear or block. It allows for effective identification and fraud detection capabilities even with stricter privacy settings and cookie restrictions.


