

Summarize this article with
According to a 2022 study by LexisNexis, every dollar of fraud costs US businesses an average of $3.75, and this figure is expected to rise as fraudsters become increasingly sophisticated in their tactics. Accurately identifying visitors helps prevent online fraud by allowing websites and online services to detect and mitigate potentially fraudulent activities—such as account abuse, credential stuffing, and account takeovers—by monitoring device usage patterns and implementing appropriate security measures.
Compared to traditional identification methods such as cookies, which can be deleted or blocked, and IP addresses, which can be shared or change frequently, browser fingerprinting solutions like Fingerprint Pro generate highly accurate and stable identifiers for devices. Fingerprinting combines dozens of browser attributes — such as screen resolution, operating system, IP address, and loaded fonts — along with other identifiers to create a unique fingerprint for each visitor.
This article shows you how to integrate Fingerprint Pro into a Vue.js application to reliably identify visitors and prevent fraudulent activities. You'll set up a Vue.js application with a back-end server, integrate the Vue.js Fingerprint Pro SDK, generate visitor IDs on the frontend, and securely transmit them to the backend for storage and validation using PostgreSQL.
Project Overview and Prerequisites
To follow along, you need the following:
- A Fingerprint Pro account. You can sign up for a free fourteen-day trial.
- Node.js version 18 or higher
- PostgreSQL
- Yarn or Npm installed
- Working knowledge of JavaScript and Vue.js
Project Setup
To get started, clone this repository and switch to the starter branch. It has all the dependencies and directory structure you'll need to follow this tutorial. The project makes use of concurrently to run both backend and frontend folders simultaneously.
Use the following steps to install project dependencies and start the development server for the frontend on http://localhost:8080 and the backend on http://localhost:3000 Navigate to the frontend directory and install the dependencies by running these commands from the root directory:
cd frontend
npm install
Then, navigate to the backend directory and install the dependencies by running these commands from the root directory:
cd ..
cd backend
npm install
Ensure you create a .env file at the root of the project. Then add your Postgres database connection URL like this:
DATABASE_URL=postgresql://username:password@localhost:5432/your-database-nameTo start the project dev server, run this command:
npm run start # or yarn startNext, create a PostgreSQL database and create a users table with this SQL command:
CREATE TABLE users (
  id SERIAL PRIMARY KEY,
  email VARCHAR(255) UNIQUE NOT NULL,
  password VARCHAR(255) NOT NULL,
  username VARCHAR(255) NOT NULL,
  fingerprint VARCHAR(255)
);
This SQL command creates a new table named users in a database that stores user information with five columns: id, email, password, username, and fingerprint. The id column is set as the primary key and automatically increments with each new record to ensure a unique row id. The email column is marked as unique to prevent duplicate entries, while the fingerprint column is used to store visitor IDs from Fingerprint, which may not be unique if multiple users are registering from the same device.
How the Application Works
Consider an example application where you offer a free and a paid tier. If a user uses the free tier, they can use the application only on a single device, whereas a paid user gets to use unlimited devices. In this app, when someone registers, it captures a unique visitor ID for their device, storing it alongside their email, username, and password. Fingerprint examines various aspects of the user's device to generate this visitor identifier. This ensures that each account is linked to a single device.
During the login process, the app verifies whether the visitor ID aligns with the one stored during registration. If they match, access is granted, confirming the login attempt is from the registered device. If there's a discrepancy, access is denied, and the user is informed, preventing unauthorized account access. The requestId is also used during login to verify the fingerprint's authenticity helping to prevent spoofing.
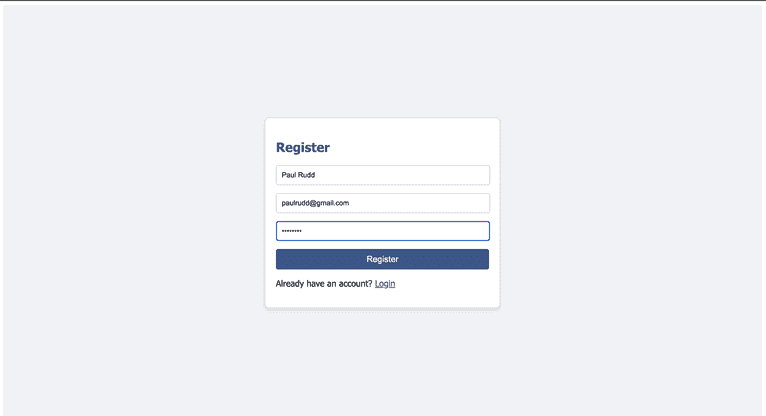
Now, let's dive into the technical implementation. Navigate to http://localhost:8000/register on your browser, where you should see this:
Clicking on the Register button in the final app will redirect you to the home page:

In the following sections of this article, you'll integrate Fingerprint into your app to eliminate the possibility of duplicate accounts.
Integrate Fingerprint Pro for User Identification in Vue
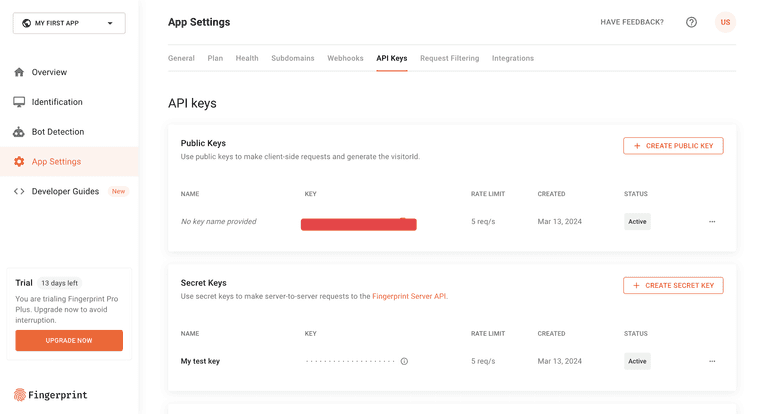
Log in to your Fingerprint dashboard and select App Settings from the sidebar menu. Next select API Keys in the top bar. Copy the public API key to your clipboard.
Head back to your terminal and install the Fingerprint Pro SDK for Vue 3 in your frontend with this command:
npm i @fingerprintjs/fingerprintjs-pro-vue-v3To register the plugin, update src/main.js in the frontend directory with these lines of code. Update PUBLIC_API_KEY with your actual API key:
import { createApp } from "vue";
import App from "./App.vue";
import router from "./router";
import { fpjsPlugin } from "@fingerprintjs/fingerprintjs-pro-vue-v3";

const app = createApp(App);
app.use(router);
app
  .use(fpjsPlugin, {
    loadOptions: {
      apiKey: "PUBLIC_API_KEY",
    },
  })
  .mount("#app");
Note: If you're using Vue 2, make sure to use the corresponding version of the plugin that's compatible with Vue 2.
Next, you'll use the plugin in your Vue app. Navigate to components/UserRegister.vue and modify the existing code with this:
<template>
...
</template>
<script setup>
import { ref } from "vue";
import axios from "axios";
import { useRouter } from "vue-router";
import toastr from "toastr";
import "toastr/build/toastr.min.css";
import { useVisitorData } from "@fingerprintjs/fingerprintjs-pro-vue-v3";

const email = ref("");
const password = ref("");
const username = ref("");
const router = useRouter();

// Initialize the hook to get visitor data
const { data, error, getData } = useVisitorData();

const register = async () => {
  // Retrieve the VisitorID
  await getData();
  // Check if there's an error while getting the VisitorID
  if (error.value) {
    toastr.error(error.value.message);
    return;
  }
  // Check if the VisitorID data is available
  if (!data.value || !data.value.visitorId) {
    toastr.error("Could not retrieve the device identifier.");
    return;
  }
  // Send user registration data to your backend
  axios
    .post("http://localhost:3000/register", {
      email: email.value,
      password: password.value,
      username: username.value,
      visitorId: data.value.visitorId,
    })
    .then((response) => {
      toastr.success("Registration successful");
      localStorage.setItem("user", response.data.username);
      router.push("/login");
    })
    .catch((error) => {
      toastr.error(error.response?.data?.message || "Registration failed due to an unexpected error.");
    });
};
</script>
Here, the useVisitorData hook from the FingerprintJS Pro SDK is used to retrieve a unique visitorId for each user attempting to register. This visitorId, which serves as a sophisticated method of browser fingerprinting, is included in the registration request payload sent to the back-end server to enhance the integrity and security of the registration process.
You'll similarly use the Fingerprint Pro plugin to verify the device during user login. Add the following lines of code to your components/UserLogin.vue file:
<template>
…
</template>
<script setup>
import { ref } from "vue";
import axios from "axios";
import { useRouter } from "vue-router";
import toastr from "toastr";
import "toastr/build/toastr.min.css";
import { useVisitorData } from "@fingerprintjs/fingerprintjs-pro-vue-v3";

const router = useRouter();
const email = ref("");
const password = ref("");

// Initialize the hook to get visitor data
const { data, error, getData } = useVisitorData();

const login = async () => {
  await getData();

  if (error.value) {
    toastr.error(error.value.message);
    return;
  }

  if (!data.value || !data.value.visitorId) {
    toastr.error("Could not retrieve the device identifier.");
    return;
  }

  axios
    .post("http://localhost:3000/login", {
      email: email.value,
      password: password.value,
      visitorId: data.value.visitorId,
      requestId: data.value.requestId,
    })
    .then((response) => {
      localStorage.setItem("token", response.data.token);
      localStorage.setItem("user", JSON.stringify(response.data.user));
      router.push("/");
      toastr.success("Logged in successfully");
      email.value = "";
      password.value = "";
    })
    .catch((error) => {
      toastr.error(error.response?.data?.message || "Login failed due to an unexpected error.");
    });
};
</script>
This code snippet initiates the process of retrieving the device's visitor identifier using the useVisitorData hook from the Fingerprint Pro SDK. Upon successfully obtaining the visitorId and the associated requestId, it attempts to log in by sending these identifiers along with the user's email and password to your backend via a POST request.
Including requestId alongside visitorId allows your backend to perform additional validations against the FingerprintJS Pro Server API, ensuring the authenticity of the login attempt and enhancing security measures.
Implementing Device-Specific User Access
On the backend, you'll be using the Fingerprint Pro Server API to perform server-side validation of the visitorId received from the frontend. This step ensures the integrity and authenticity of the visitor identification process by validating the visitor identifier against the server-side data, checking the request's age, and verifying the confidence score to prevent potential forgery attempts or abuse.
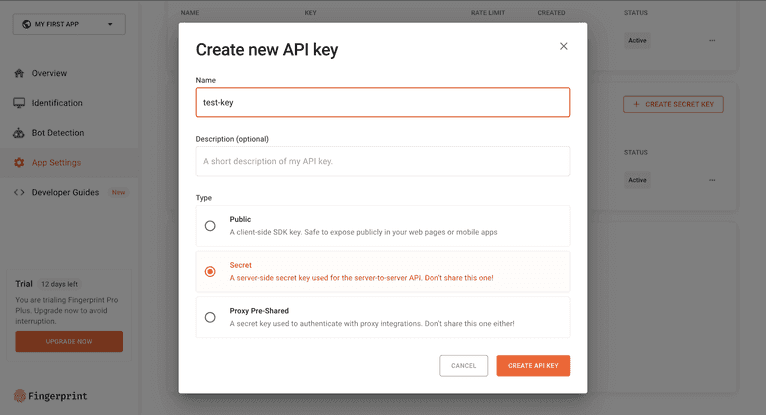
To obtain your Fingerprint Pro Secret API key, navigate to App Settings > API Keys in your account dashboard and click Create Secret Key. Provide a descriptive name for the key, then click Create API Key.
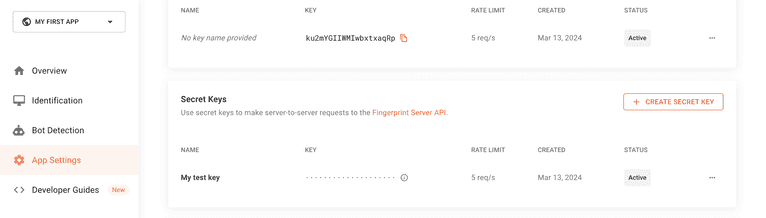
Your newly generated API key will be displayed on the screen. When you receive your Fingerprint Pro Secret API key, it's important to keep it secure. Add it to the .env file located in the root directory of your back-end project. If you don't have an .env file yet, create one and include your API key like so: SECRET_API_KEY=your-api-key. This will allow your application to access the key without exposing it in your codebase.
Update the index.js file in the backend directory with the following lines of code after the last import:
…//other imports
const { FingerprintJsServerApiClient, Region } = require('@fingerprintjs/fingerprintjs-pro-server-api');

const client = new FingerprintJsServerApiClient({
    apiKey: process.env.SECRET_API_KEY,
    region: Region.Global, // Adjust based on your account's region
});
Here, you initialize the Fingerprint Pro Server API client using your API key and the appropriate region for your account. This client will be used to validate the visitor identifier and retrieve additional information about the visitor identification event.
Registration Process
During user registration, the system collects and stores the visitor ID along with traditional account information, such as email, username, and password. In this basic example, this process imposes no restrictions based on the visitor ID:
app.post("/register", async (req, res) => {
  const { email, password, username, visitorId } = req.body;

  // Check if the email is already registered
  const emailCheck = await pool.query("SELECT * FROM users WHERE email = $1", [
    email,
  ]);
  if (emailCheck.rows.length > 0) {
    return res.status(400).json({ message: "Email already registered" });
  }

  // Hash password
  const hashedPassword = await bcrypt.hash(password, 10);

  // Insert user into database with the fingerprint
  await pool.query(
    "INSERT INTO users (username, email, password, fingerprint) VALUES ($1, $2, $3, $4)",
    [username, email, hashedPassword, visitorId]
  );
  res
    .status(201)
    .json({ message: "User registered successfully.", username: username });
});
Head to the /register route on your browser and try registering a user. You should see a screen that confirms successful registration:

Login Verification
Next, you'll introduce a security measure during login that validates the visitor ID against the one stored during registration. If the visitor ID provided during login matches the stored fingerprint, access is granted. Conversely, if there's a mismatch, indicating an attempt to access the account from a different device, the system blocks the login attempt and issues an alert.
Update the backend/index.js file with these lines of code for the login endpoint:
app.post('/login', async (req, res) => {
    const { email, password, visitorId } = req.body;
try {
    // Check if user exists and get their fingerprint
    const user = await pool.query('SELECT * FROM users WHERE email = $1', [email]);
    if (user.rows.length === 0) {
        return res.status(400).json({ message: 'User not found.' });
    }

    // Check if the provided visitorId matches the stored visitorId
    if (user.rows[0].fingerprint !== visitorId) {
        return res.status(400).json({ message: ''New Browser Detected'' });
    }

    // Verify password
    const validPassword = await bcrypt.compare(password, user.rows[0].password);
    if (!validPassword) {
        return res.status(400).json({ message: 'Invalid password.' });
    }

    // Generate JWT
    const token = jwt.sign({ id: user.rows[0].id }, process.env.SECRET_KEY, { expiresIn: '1h' });

    // Login successful
    res.json({ token, user: { username: user.username } });
} catch (error) {
        console.error(error);
        res.status(500).json({ message: 'Server error.' });
    }
});
To test that this works, log in to your Postgres database and clear the data inside the user table using this SQL command:
TRUNCATE TABLE users;Now try to log in to the app again with the same username and password.
The validations here not only secure the account but also adhere to a one-device-per-user policy, ensuring that each account is accessed only from a registered device.
Server-Side Validation during Login
When a user attempts to log in, you should use the Fingerprint Pro Server SDK to ensure the validity of the fingerprint. This involves performing checks to confirm the visitor ID's authenticity, such as verifying that it matches the one stored during registration and assessing its integrity to guard against any potential tampering or replay attacks.
Add the following code to integrate these validations into your login endpoint:
app.post('/login', async (req, res) => {
    const { email, password, visitorId, requestId } = req.body;

    try {
        // Retrieve the user and their stored visitorId
        const user = await pool.query('SELECT * FROM users WHERE email = $1', [email]);
        if (user.rows.length === 0) {
            return res.status(400).json({ message: 'User not found.' });
        }


        // Validate the visitorId using the Fingerprint Pro Server API
        const event = await client.getEvent(requestId);
        const identificationData = event.products.identification.data;
        const serverVisitorId = identificationData.visitorId;
        const confidence = identificationData.confidence.score;
        const now = Date.now() / 1000;
        const identifiedAt = event.timestamp / 1000;
        const diff = now - identifiedAt;
        const maxRequestLifespan = 60; // seconds
        const minimumConfidenceScore = 0.9;

        // Check the request's validity based on its age
        if (diff > maxRequestLifespan) {
            return res.status(400).json({ message: 'Expired request ID.' });
        }

       // Check if the confidence score meets the minimum threshold
        if (confidence < minimumConfidenceScore) {
            return res.status(400).json({ message: 'Low confidence in visitor ID.' });
        }

        // Check if the visitorId matches the stored visitorId
        if (serverVisitorId !== visitorId || user.fingerprint !== visitorId) {
            return res.status(400).json({ message: 'New Browser Detected' });
        }


        // Proceed with password verification and other login steps
In this updated login endpoint, you first retrieve the user's information and stored visitor ID from your database. You then validate the visitor ID provided during the login attempt using the Fingerprint Pro Server API, checking for the request's age and the confidence score.
If the validation fails due to an expired request, a low confidence score, or a mismatched visitor ID, the login attempt is denied and an error message is returned. Successful validation, followed by password verification, leads to the generation of a JWT, which is then returned to the user, signifying a successful login.
You should also perform these server validations during registration as the visitorId can be spoofed during this process. Fingerprint's Server API documentation has more information about other server checks you can execute.
After you set up user registration with device fingerprinting, it's important to verify that the login process works as intended and adheres to the "one device per user" rule. To do this, navigate to the /login route in your application and log in using the credentials you registered with. If the login is successful and the visitor ID matches the one stored during registration, you should be granted access to the user's account.
Note: Ad blockers and privacy-focused browsers like Brave block HTTP requests made to Fingerprint servers and prevent you from identifying all of your visitors. For testing purposes, you need to disable the ad blockers and fingerprint protections in your browser. In production, you can protect the JS agent requests from getting blocked.
Next, test the login process from a different browser or device that was not used to register the account. This simulates an attempt to access the account from an unregistered device.
In line with the "one device per user" rule, when the system detects a login attempt from a device whose fingerprint doesn't match the one stored on file, it's not just about denying access. In practical applications, this scenario is an opportunity to introduce a security checkpoint, where you can log the user out from the last device used or the user can verify that they want this to be their only device.
While implementing these additional verification steps is beyond the scope of this tutorial — thus, the login is simply blocked — incorporating such measures in a real-world setting can significantly enhance security by ensuring that the person attempting to log in is indeed the account holder.
Conclusion
Congratulations! You now know how to generate a browser fingerprint in Vue applications using Fingerprint to accurately identify users based on their device characteristics, even in the absence of traditional identifiers like cookies.
Integrating the Fingerprint Pro SDK into your Vue project allows you to effectively identify unique visitors and prevent fraudulent activities such as duplicate account creation account takeover. The process involves initializing the SDK, retrieving the visitorId and requestId, and sending them to your backend for validation and storage.
If you're interested in experiencing the benefits of Fingerprint firsthand, sign up for a free trial.
FAQ
Browser fingerprinting is a method to uniquely identify website users by analyzing details about their web browsers to generate an identifier. This information can include details like browser version, screen resolution, and installed fonts to uniquely identify a user's device.
Adding browser fingerprinting to your app can enhance security by detecting and preventing fraudulent activities. It can also be used to improve user experience by enabling personalized settings without requiring logins.
Browser fingerprinting provides a much more persistent form of visitor identification than cookies, which users can easily clear or block. It allows for effective identification and fraud detection capabilities even with stricter privacy settings and cookie restrictions.


