

Summarize this article with
Browser fingerprinting is an identification technique that aims to uniquely identify website visitors by collecting details about the user's browser. Browser fingerprinting uses various properties — such as the browser type, screen resolution, settings, fonts, and installed plugins — to create a stable and unique identifier that can recognize the browser.
Uniquely identifying visitors allows you to recognize legitimate users, which can be used to combat malicious actors, fraud, account-takeover attempts, paywall bypassing, and many more scenarios.
In this article, you'll learn how to use Fingerprint, a powerful device intelligence platform, and how to integrate browser fingerprinting into an Angular application.
Prerequisites
To follow along with this tutorial, you'll need the following:
- A Fingerprint Pro account. You can sign up for a free fourteen-day trial.
- Latest version of Angular installed. This article is tested on Angular 17.3.1.
- The latest version of a browser such as Google Chrome. (Note that privacy-focused browsers, such as Brave, and ad blockers might block Fingerprint from working properly, but there are workarounds.)
Setting Up the Starter Project
For this tutorial, a starter app has already been created and is available on GitHub.
Clone the repo to your local machine:
git clone https://github.com/heraldofsolace/fingerprint-angular-demo.git
cd fingerprint-angular-demo
The app uses an Angular frontend and a Node.js backend. The backend is located in the backend directory.
First, move to the backend directory and install the dependencies:
cd backend
npm install
The backend uses an SQLite database managed by Sequelize ORM, which keeps the database interaction straightforward and easy to work with.
Create and migrate the database using sequelize-cli:
npx sequelize-cli db:migrateThis will create an SQLite database in the db directory.
Create the file .env with the following content:
JWT_SECRET=mysecretYou can now start the server by running npm start. The server uses nodemon to continuously monitor for changes in the code and restarts automatically when the code is changed. This means you can keep it running as you follow along with the tutorial.
In another terminal, navigate to the root of the project and install the dependencies:
npm installThen start the Angular server:
ng serveVisit http://localhost:4200/register in your browser, and you'll be greeted with a simple register screen. You can sign up using an email ID and a password.
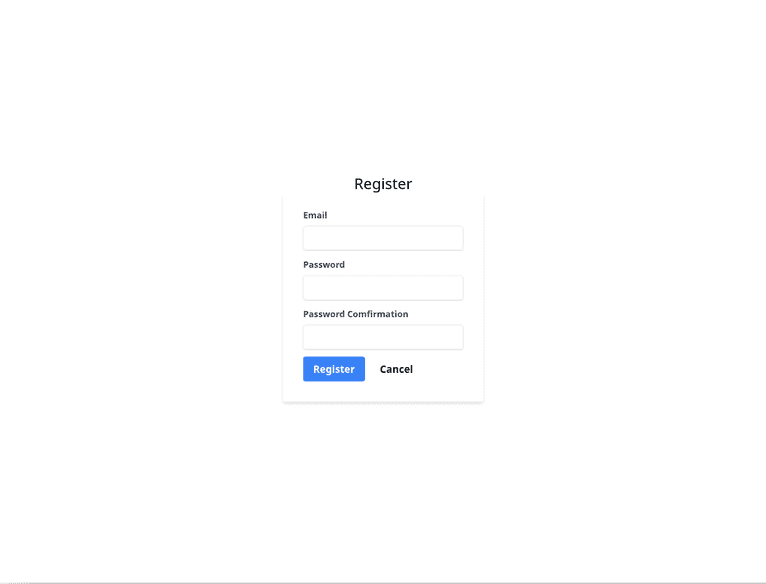
Upon successful registration, you'll be taken to the login screen.
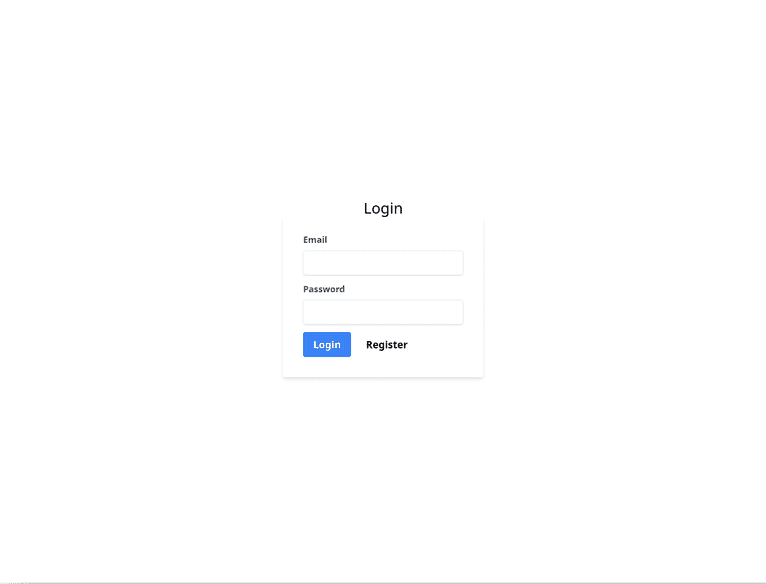
When you log in, you'll be redirected to the home screen.

Adding Fingerprint
Browser fingerprinting can be used in many ways. This article explores a common scenario: asking a user to verify when they log in from a new browser.
When a user logs in from a new browser, it can either be a legitimate user logging in with a new browser or a malicious actor who has gotten hold of their credentials. You'll use Fingerprint to identify new browsers and add friction by asking the user to provide additional verification. Once verified, the user will not be asked to verify again from that browser.
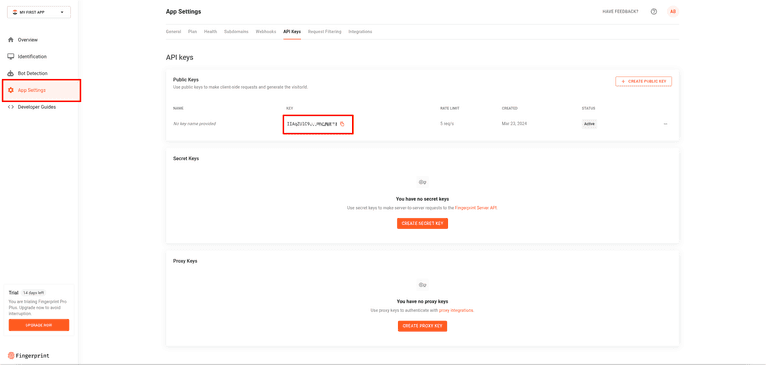
In your Fingerprint dashboard, navigate to App Settings > API Keys and copy the public API key.
Adding Fingerprint to the Frontend
Install the Fingerprint Angular SDK in the root of the project:
npm install @fingerprintjs/fingerprintjs-pro-angularCreate an environment by running the following command:
ng generate environmentsReplace the content of both environments/environment.ts and environments/environment.development.ts with the following:
export const environment = {
  fpApiKey: "<YOUR_API_KEY>",
  fpRegion: "<FINGERPRINT_REGION>", // 'us' for USA, 'eu' for Europe, 'ap' for Asia-Pacific
};
Replace <YOUR_API_KEY with the Fingerprint public API key and <FINGERPRINT_REGION> with the region you chose when you signed up for Fingerprint.
Open src/app/app.config.ts and add the following imports:
import { FingerprintjsProAngularModule } from "@fingerprintjs/fingerprintjs-pro-angular";
import { Region } from "@fingerprintjs/fingerprintjs-pro";
import { environment } from "../environments/environment";
In the providers array, add a new entry:
importProvidersFrom(
  FingerprintjsProAngularModule.forRoot({
    loadOptions: {
      apiKey: environment.fpApiKey,
      region: environment.fpRegion as Region,
    },
  })
);
This piece of code imports the Fingerprint Pro Angular Module and makes it available for use throughout the application.
To store the verification state of the browser, edit the User model at src/app/user.model.ts and add a new verifiedDevice property:
export interface User {
  id?: string;
  email?: string;
  password?: string;
  createdAt?: Date;
  updatedAt?: Date;
  token?: string;
  verifiedDevice?: boolean; // Add this
}
Open src/app/auth.service.ts and replace the register function with the following:
register(email: string, password: string, password_confirm: string, visitor_id: string) {
  return this.http.post(`${this.url}/register`, { email, password, password_confirm, visitor_id });
}
Nothing complicated is going on here. You have simply added a visitor_id parameter, which you are passing to the backend in the /register route.
Replace the login method with the following:
login(email: string, password: string, request_id: string, visitor_id: string) {
  return this.http.post<User>(`${this.url}/login`, { email, password, request_id, visitor_id})
	.pipe(map(user => {
  	localStorage.setItem('user', JSON.stringify(user));
  	this.userSubject.next(user);
  	return user;
	}));
}
Here, you're adding new parameters, visitor_id and request_id, both of which will be sent to the backend.
Add a new verify method that'll make a call to the /verify route of the backend:
verify(visitor_id: string) {
  return this.http.post<{ verified: boolean }>(`${this.url}/verify`, { visitor_id }, { headers: { Authorization: `Bearer ${this.userValue?.token}` }});
}
Now, you'll modify the RegisterComponent class to send the visitor ID during registration. You'll use Fingerprint to request a visitor ID and pass it to the backend.
Open src/app/register/register.component.ts and add the following imports:
import { FingerprintjsProAngularService } from "@fingerprintjs/fingerprintjs-pro-angular";In the constructor, add a FingerprintjsProAngularService parameter:
constructor(
	private formBuilder: FormBuilder,
	private route: ActivatedRoute,
	private router: Router,
	private authService: AuthService,
	private fingerprintService: FingerprintjsProAngularService, // Add this
) { }
This will cause Angular to inject an instance of FingerprintjsProAngularService into the RegisterComponent class.
Replace the onSubmit function with the following code:
async onSubmit() {
  this.submitted = true;


  if(this.f.password.value !== this.f.password_confirm.value) {
	this.f.password_confirm.setErrors({ mustMatch: true });
	return;
  }

  if (this.form.invalid) {
  	return;
  }


  this.loading = true;
  const data = await this.fingerprintService.getVisitorData();
  this.authService.register(this.f.email.value, this.f.password.value, this.f.password_confirm.value, data.visitorId)
  	.pipe(first())
  	.subscribe({
      	next: () => {
          	alert('Registration successful');
          	this.router.navigate(['../login'], { relativeTo: this.route });
      	},
      	error: e => {
          	alert(e.error.error);
          	this.loading = false;
      	}
  	});
}
Note the new additions to the code. You're using this.fingerprintService.getVisitorData() to fetch the visitor data, which includes the visitor ID. You're then passing the visitor ID to this.authService.register.
Now, you'll need to do something similar to LoginComponent. Open src/app/login/login.component.ts and add these imports:
import { FingerprintjsProAngularService } from "@fingerprintjs/fingerprintjs-pro-angular";Add the FingerprintjsProAngularService parameter to the constructor:
constructor(
	private formBuilder: FormBuilder,
	private route: ActivatedRoute,
	private router: Router,
	private authService: AuthService,
	private fingerprintService: FingerprintjsProAngularService, // Add this
) { }
Update the onSubmit method:
async onSubmit() {
  this.submitted = true;

  if (this.form.invalid) {
  	return;
  }

  this.loading = true;
  const data = await this.fingerprintService.getVisitorData();
  this.authService.login(this.f.email.value, this.f.password.value, data.requestId, data.visitorId)
  	.pipe(first())
  	.subscribe({
      	next: () => {
        	if(this.authService.userValue?.verifiedDevice) {
          	this.router.navigate(['../home'], { relativeTo: this.route });
        	} else {
          	this.router.navigate(['../verify'], { relativeTo: this.route });
        	}
      	},
      	error: e => {
          	alert(e.error.error);
          	this.loading = false;
      	}
  	});
}
This is similar to the changes you made to RegisterComponent, except this time, the request ID has also been sent to the backend.
Create a new Verify component that will house the verification page:
ng generate component VerifyAdd the following code in src/app/verify/verify.component.html:
<div class="flex flex-col items-center justify-center w-full h-screen">
  <button
    (click)="onClick()"
    class="bg-blue-500 hover:bg-blue-700 text-white font-bold py-2 px-4 rounded focus:outline-none focus:shadow-outline"
  >
    Verify this device
  </button>
</div>
Paste the following code in src/app/verify/verify.component.ts:
import { Component } from "@angular/core";
import { Router, ActivatedRoute, RouterModule } from "@angular/router";
import { AuthService } from "../auth.service";
import { first } from "rxjs/operators";
import { CommonModule } from "@angular/common";
import { FingerprintjsProAngularService } from "@fingerprintjs/fingerprintjs-pro-angular";

@Component({
  selector: "app-verify",
  standalone: true,
  imports: [],
  templateUrl: "./verify.component.html",
  styleUrl: "./verify.component.scss",
})
export class VerifyComponent {
  constructor(
    private route: ActivatedRoute,
    private router: Router,
    private authService: AuthService,
    private fingerprintService: FingerprintjsProAngularService
  ) {}

  async onClick() {
    const data = await this.fingerprintService.getVisitorData();
    this.authService
      .verify(data.visitorId)
      .pipe(first())
      .subscribe({
        next: (value) => {
          if (value.verified)
            this.router.navigate(["../home"], { relativeTo: this.route });
          else alert("Device not verified");
        },
        error: (e) => {
          alert(e.error.error);
        },
      });
  }
}
This is a simple component that shows a Verify button and makes an HTTP request to the /verify endpoint of the backend, which completes the verification of the browser.
Note: This is a very simple and not-so-secure verification example for demonstration purposes. In a real-life app, you'll likely use something more secure, such as an email or SMS OTP or a captcha.
Now, open src/app/app.routes.ts and add a new route in the routes array:
{ path: 'verify', component: VerifyComponent, canActivate: [AuthGuard]},Don't forget to import the VerifyComponent:
import { VerifyComponent } from "./verify/verify.component";Adding Fingerprint to the Backend
The frontend is now complete. Let's move on to the backend. Make sure you're in the backend directory and run the following command to generate a new Sequelize model:
npx sequelize-cli model:generate --name Fingerprint --attributes UserId:integer,visitorId:string,verified:booleanThis creates a new Fingerprint model with the visitor ID and a verified status. The UserId attributes help Sequelize create a many-to-one relationship with the User model, where one User can have multiple Fingerprint records.
The command above will create a migration file in migrations, named something like TIMESTAMP-create-fingerprint.js. Open this file, find the UserId and verified attributes in the queryInterface.createTable method, and modify them as shown below:
UserId: {
  type: Sequelize.INTEGER,
  references: {
  	model: 'Users',
  	key: 'id'
  }
},

verified: {
  type: Sequelize.BOOLEAN,
  defaultValue: false
},
By adding the references key to the UserId attribute here, you're marking UserId as a foreign key that'll help build the association between the User and Fingerprint models at the database level. You're also setting the default value of verified to false, which will make sure new browsers are unverified by default.
Open models/user.js and modify the associate method to include the hasMany association with Fingerprint:
static associate(models) {
  User.hasMany(models.Fingerprint);
}
Open models/fingerprint.js and add the default value to the verified field in the Fingerprint.init call:
verified: {
  type: DataTypes.BOOLEAN,
  defaultValue: false
}
And modify the associate method:
static associate(models) {
  Fingerprint.belongsTo(models.User);
}
Migrate the database, which will create the new tables and associations:
npx sequelize-cli db:migrateWith the database ready, you'll need to modify the routes to make use of the visitor ID. Open index.js and find the User import:
const { User } = require("./models");Modify it to import the Fingerprint model as well:
const { User, Fingerprint } = require("./models");Start with the /register route:
app.post("/register", async (req, res) => {
  const { email, password, password_confirm, visitor_id } = req.body;
  if (password !== password_confirm) {
    return res.status(400).send({ error: "Passwords do not match" });
  }

  if (!visitor_id) {
    return res.status(400).send({ error: "Visitor ID is required" });
  }

  const user = await User.findOne({ where: { email } });
  if (user) {
    return res.status(400).send({ error: "User already exists" });
  }
  const salt = bcrypt.genSaltSync(10);
  const hash = bcrypt.hashSync(password, salt);
  try {
    const user = await User.create(
      {
        email,
        password: hash,
        Fingerprints: [{ visitorId: visitor_id, verified: true }],
      },
      {
        include: [{ association: User.hasMany(Fingerprint) }],
      }
    );
    res.status(201).send({ error: null, user: { email } });
  } catch (e) {
    res.status(500).send({ error: e.message });
  }
});
This is very similar to what was there before, but note the following line:
const user = await User.create(
  {
    email,
    password: hash,
    Fingerprints: [{ visitorId: visitor_id, verified: true }],
  },
  {
    include: [{ association: User.hasMany(Fingerprint) }],
  }
);
This code creates a new User and stores the visitor ID in a new Fingerprint record. It then associates the two records and saves them in the database.
Now, modify the /login route as shown below:
app.post("/login", async (req, res) => {
  const { email, password, request_id, visitor_id } = req.body;

  if (!visitor_id) {
    return res.status(400).send({ error: "Visitor ID is required" });
  }

  const user = await User.findOne({ where: { email }, include: Fingerprint });
  if (!user) {
    return res.status(401).send({ error: "Invalid email or password" });
  }

  const valid = bcrypt.compareSync(password, user.password);
  if (!valid) {
    return res.status(401).send({ error: "Invalid email or password" });
  }

  const token = jwt.sign({ email }, process.env.JWT_SECRET, {
    expiresIn: 86400,
  });

  const fingerprints = await user.getFingerprints({
    where: { visitorId: visitor_id },
  });

  let verified = false;
  if (fingerprints.length === 0) {
    await user.createFingerprint({ visitorId: visitor_id });
  } else {
    verified = fingerprints[0].verified;
  }

  delete user.dataValues.password;
  res.status(200).send({ ...user.dataValues, token, verifiedDevice: verified });
});
This route is slightly more complicated. First of all, the route will not let the user log in without a valid visitor ID. Although the frontend sends a visitor ID, it's good protection in case someone tampers with the frontend code or calls the API directly:
if (!visitor_id) {
  return res.status(400).send({ error: "Visitor ID is required" });
}
Next, it finds the User corresponding to the email ID along with all the associated Fingerprint records:
const user = await User.findOne({ where: { email }, include: Fingerprint });After the password is verified, the Fingerprint record associated with the User with the same visitorID is fetched:
const fingerprints = await user.getFingerprints({
  where: { visitorId: visitor_id },
});
If no such Fingerprint record exists, it is a new browser that the user has not used before, so you create a new Fingerprint record with an unverified state. Otherwise, you fetch the verification state of the Fingerprint record and send it as a response:
let verified = false;
if (fingerprints.length === 0) {
  await user.createFingerprint({ visitorId: visitor_id });
} else {
  verified = fingerprints[0].verified;
}

delete user.dataValues.password;
res.status(200).send({ ...user.dataValues, token, verifiedDevice: verified });
Next, add a new /verify route:
app.post("/verify", verifyToken, async (req, res) => {
  const { visitor_id } = req.body;
  const user = await User.findOne({
    where: { email: req.user.email },
    include: Fingerprint,
  });

  const fingerprints = await user.getFingerprints({
    where: { visitorId: visitor_id },
  });

  if (fingerprints.length === 0) {
    return res.status(404).send({ error: "Fingerprint not found" });
  }

  await fingerprints[0].update({ verified: true });

  res.status(200).send({ verified: true });
});
This route simply updates the verified field of the corresponding Fingerprint record.
Server-Side Validations
Using the Fingerprint server SDK and performing additional server-side validations allows you to increase the validity of the fingerprint. Some of the validations you can perform include fingerprint tampering checks, incognito mode checks, VPN checks, and bot detection.
In this section, you'll use the server SDK to ensure that the fingerprint has not been tampered with by the client.
First, install the backend SDK in the backend directory:
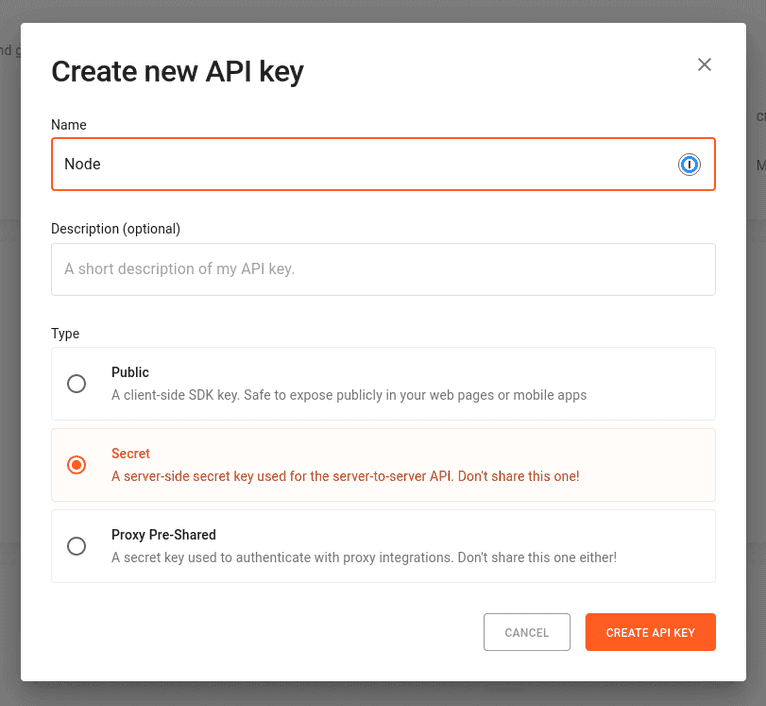
npm install @fingerprintjs/fingerprintjs-pro-server-apiIn the Fingerprint dashboard, navigate to App Settings > API keys and click CREATE SECRET KEY.

Give the key a name and click CREATE API KEY.
Copy the generated key and add a new environment variable to the .env file:
FP_SERVER_KEY=<YOUR_API_KEY>In index.js, add the necessary imports:
const {
  FingerprintJsServerApiClient,
  Region,
} = require("@fingerprintjs/fingerprintjs-pro-server-api");
Create a new instance of FingerprintJsServerApiClient:
const client = new FingerprintJsServerApiClient({
  apiKey: process.env.FP_SERVER_KEY,
  region: Region.AP,
});
In the region key, choose the region you signed up with: Region.Global for US, Region.EU for Europe, and Region.AP for Asia-Pacific.
In the /login route, right after the if(!visitor_id) check, add the following code:
const event = await client.getEvent(request_id);
const visitorData = event.products?.identification?.data;
if(visitorData?.visitorId !== visitor_id) {
	return res.status(401).send({ error: 'Visitor ID has been tampered with' });
}

if (new Date().getTime() - visitorData?.timestamp > 3000) {
	return res.status(401).send({ error: 'Fingerprinting event was more than 3 seconds ago' });
}

if (req.header("x-forwarded-for").split(",")[0] !== visitorData?.ip) {
 	return res.status(401).send({ error: ‘IP address does not match' });
}
This code fetches the identification event based on the request ID. The identification event stores the generated visitor ID, which is then compared with the visitor ID sent by the client. If they don't match, it might indicate that the client has tampered with the visitor ID, and so the user is not allowed to log in. The second check ensures the freshness of the identification. A malicious actor can obtain the fingerprint using phishing. The second check prevents the use of phished fingerprints by ensuring that the fingerprint is not more than three seconds old. The third check ensures that the login request comes from the same IP address as the identification request.
Note: You can also perform the same checks during registration by passing the request ID.
Now, it's time to test the app. Go to http://localhost:4200/register and register a new user. Then, open a different browser, where you'll be asked to verify your login.

Only after verifying the new login will you be allowed to visit the home page.
You can find the complete app on GitHub in the final branch.
Advantages of Browser Fingerprinting
Other common ways of identifying users include session tracking, HTTP cookies, and IP. However, browser fingerprinting with Fingerprinting Pro outshines them all:
- Session tracking uses sessions stored in the browser, but this can be bypassed by using incognito mode. With Fingerprint Pro, the fingerprint doesn't change even if incognito mode is used.
- HTTP cookies also suffer the same issue as sessions. They can be bypassed using incognito mode, and the user can also clear them.
- IP tracking cannot be used to uniquely identify a visitor. Multiple devices can share the same IP address (such as university computers), and it can easily be spoofed (such as by using a proxy).
Fingerprint Pro also offers server SDKs that can perform additional checks to ensure the validity of the identifications, something that's not available in the other methods.
Conclusion
Browser fingerprinting is a valuable technique for protecting your applications against bots, fraud, and malicious actors while ensuring genuine users can enjoy a frictionless, secure experience.
In this article, you learned how to incorporate Fingerprint into an Angular app to perform browser fingerprinting. You also saw how to use Fingerprint's server-side validations to bolster security further.
If you'd like to use browser fingerprinting in your app, you can sign up for a free trial of Fingerprint Pro.
FAQ
Browser fingerprinting is a method to uniquely identify website users by analyzing details about their web browsers to generate an identifier. This information can include details like browser version, screen resolution, and installed fonts to uniquely identify a user's device.
Adding browser fingerprinting to your app can enhance security by detecting and preventing fraudulent activities. It can also be used to improve user experience by enabling personalized settings without requiring logins.
Browser fingerprinting provides a much more persistent form of visitor identification than cookies, which users can easily clear or block. It allows for effective identification and fraud detection capabilities even with stricter privacy settings and cookie restrictions.


