Summarize this article with
While having user-generated content is a great way to add interactivity and community to your website, it, unfortunately, leaves you open to abuse from malicious users. Nudity, harassment, spam, advertising, or even malware and viruses are some unwanted content you may have to deal with. Sometimes, content moderation and warnings can help keep your users in line. But in many cases, these offenders are aggressive and cunning with their approach, and you’ll have to take the extreme step of permanently banning them.
To permanently ban users, you must ensure they have a unique identifier. In this article, we’ll compare six methods through which you can block specific users from accessing your website content via various unique identifiers — including Fingerprint, an easy solution for comprehensive user identification.
Want to stop banned users from coming back? Start a free trial to see how Fingerprint keeps repeat offenders out for good.
1. IP address ban
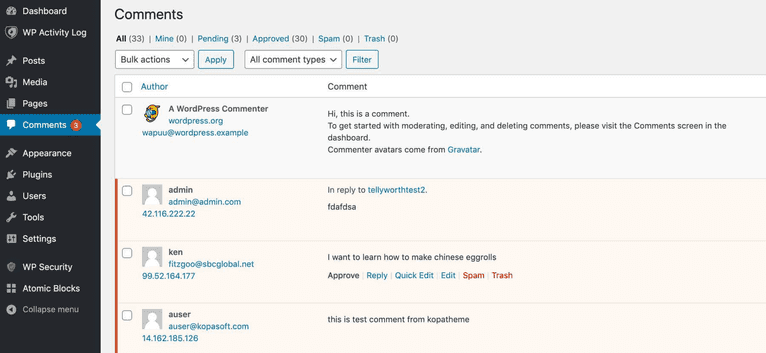
One way to block users from having the ability to visit your site is to ban their IP addresses. Depending on your forum or commenting host, like WordPress or Disqus, you’ll be able to locate the IP address of a user from the admin dashboard or server logs. For other platforms, run a browser search for how to find the IP address on [your platform].

After you’ve tracked down the IP addresses of the malicious users you’d like to block, there are several ways to implement the block. Again, depending on your hosting provider or content management system, you can stop the IP address via their platform, cPanel, or even manually using your .htaccess file.
The main limitation of an IP address ban is that it is only a temporary solution and can easily be circumvented. For example, persistent spammers can easily change their IP address by switching to a different ISP, using other devices, or using a proxy or VPN to regain access to your site.
Another shortcoming of the IP ban method is that because IP addresses are temporary and can be reassigned, you might ban IP addresses that can be reassigned to legitimate users of your site.
2. Using cookies
If you run a dynamic user personalized site, you’re most likely already using cookies to preserve states between sessions or to store user preferences for customization. Cookies are lightweight text files usually set by the server and stored on the target user’s browser to uniquely identify a particular user and their browser. They contain information like account usernames and emails alongside a randomly generated unique ID.
To ban specific users from your site using cookies, you can either set a flag identifier cookie or add the unique cookie ID of offending users to a list. Then, on page requests, check if the cookie in the request header sent by the browser is flagged or on the banned list. You can then deny access appropriately.
Suppose you’re dealing with a Node.js-based app. You’d do something like:
   app.get('/blog', (req, res)=>{
   if(req.cookies.flag === 1){
       res.status(401).send()
   }
   res.status(200).json({data: 'Welcome to the blog'})
});
request.cookies
While the cookie method is more effective than the IP ban method, it’s not foolproof either. Tech-savvy malicious users can quickly go to their browser settings and delete cookies from your website, use ad blockers to disable cookies by default, or revoke cookie consent, thus once again regaining access to your site.
3. Ban specific usernames or email addresses
You can use a registered email address or a username to identify users uniquely. For example, if you notice a user posting spammy or harmful content, you can block the user’s email address or username. As a result, they won’t be able to log in to your website, preventing them from creating a new account using the same email address.
Like with the IP ban method, if you’re using WordPress, Disqus, or any other content management system, this option already exists via the admin dashboard.
You can do this manually by flagging the database’s offending usernames and email addresses with a disabled field of 1. Then on the login page or sign-up form, you can check if the target username and email address exist and if it is marked as banned. If so, you can show an error message and refuse access to the site. Something like this:
function is_user_banned($email_address){
  return mysql_result(
      mysql_query(
        "SELECT COUNT ('user_id') FROM 'users' where 'email_address = $email_address and is_banned = 1"
      )
  )
}

function login($username, $email_address, $password){
  if (is_user_banned(email_address) == true){
      //show error message and deny access
  }
}
Again, the major limitation to this method is that a persistent user can go ahead and create a new account using a different email address and username.
4. Ban email domains
In addition to banning specific email addresses (fred.george@gmail.com), you can restrict an entire email domain(gmail.com). Why would you want to do this? Because spammers often resort to using disposable email address domains to create accounts.
A disposable or temporary email domain is a service that allows users to receive an email at a temporary address that self-destructs after a predetermined time. Examples include 10minutemail.co.za, 10minutemail.com, 10mail.org, and tempmail.com. Banning these disposable domains helps ensure that users have to sign up with a legitimate email address.
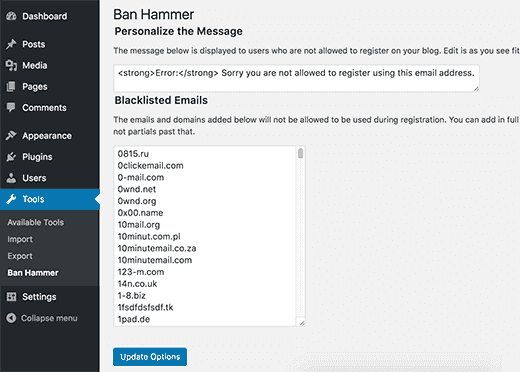
If WordPress hosts your site, follow this process to block disposable email addresses. For others, you can include this as an email validation check for your sign-up and login forms.
Here’s a list of disposable email domains you can start with:

The downside of this method is that you may end up blocking access for genuine users who use disposable email addresses to sign up for forums and online communities to protect their primary inboxes from spam.
5. Put user in stealth mode (shadowban)
Unlike previous methods, this method does not explicitly deny or ban the user from accessing your site. Instead, it does something very subtle that the user might not catch on to for some time.
Putting a user in stealth mode—sometimes called a shadowban or hellban—means putting them in a state where they’re invisible to other users but not themselves. As a result, they can perform regular user or member actions like viewing posts, creating posts, and posting comments. Still, since they’re invisible to other users, no one else sees any of their content. Eventually, stealth mode users may get frustrated due to the lack of attention and leave, and if they’re a spambot account, they might never notice. It’s like the digital version of the “silent treatment.”
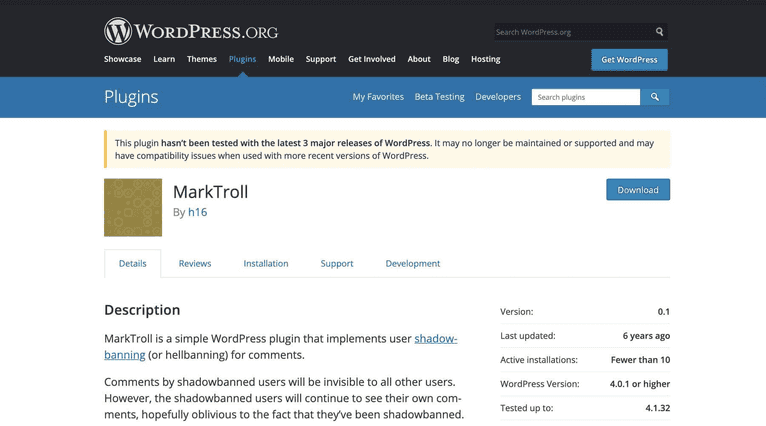
Again, using WordPress, you can use a plugin like MarkTroll. With Disqus, you can mark any user as shadowbanned from the admin dashboard.

The stealth mode method is very effective and stalls problematic users for a long time, even though they may eventually catch on and discover that something is wrong. Also, a user who eventually finds they are shadowbanned can create a new account and continue their activities.
6. Fingerprint

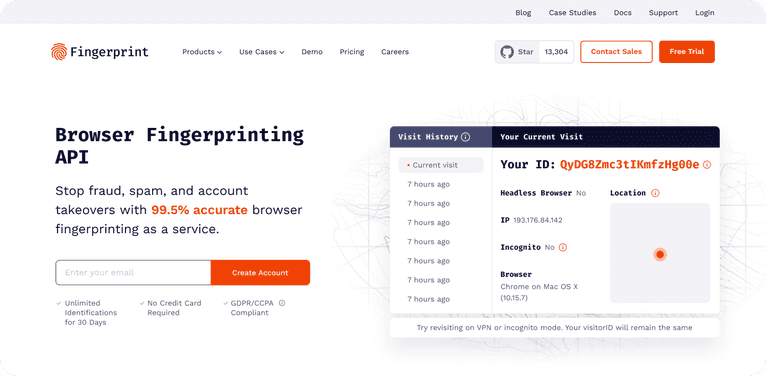
Fingerprint is a browser fingerprinting API as a service platform used to identify users uniquely.
Browser fingerprinting is a tracking method that uses JavaScript scripts to collect information that can identify a user. These scripts run in the background, uniquely aggregating data about the user’s device and browser, such as:
- Operating system
- Browser
- Installed software
- Timezone
- Preferred language
- Ad blockers
- Screen resolution
- Color depth
- Browser extensions
- Graphics card
- Drivers
- CPU
When you stitch all of these pieces together, you create a unique online “fingerprint” for a user that can trace them across different websites and browsing sessions.
Fingerprint Pro is the most accurate user identification method. Unfortunately, while a user can delete cookies, there’s no way to delete a browser fingerprint. It works in incognito mode, behind a VPN or proxy server, and across multiple browsers.
Like many JavaScript libraries, Fingerprint is easy to use and has extensive documentation. To get started, either install via NPM, yarn, or use a CDN:
npm i @fingerprintjs/fingerprintjs
# or
yarn add @fingerprintjs/fingerprintjs
Then import it and invoke it on page load:
import FingerprintJS from '@fingerprintjs/fingerprintjs';

(async () => {
  // We recommend to call `load` at application startup.
  const fp = await FingerprintJS.load();

  // The FingerprintJS agent is ready.
  // Get a visitor identifier when you'd like to.
  const result = await fp.get();

  // This is the visitor identifier:
  const visitorId = result.visitorId;
  console.log(visitorId);
})();
The script above should preferably be included in the root folder of all the JS files like index.js.
When you add a user’s unique visitor ID to a ban list with Fingerprint, it’s difficult for them to circumvent it unless they frequently switch devices. Fingerprint provides an open-source and paid solution for fingerprinting your users, with industry-leading accuracy.
Conclusion
There will always be problematic users. Such users need to be banned to facilitate civil and safer online communities for everyone.
There are well-known methods for banning users, but they all have shortcomings and can be circumvented by persistent actors. Instead, consider using a robust user identification solution like Fingerprint to deny a malicious actor permanently.


