

Summarize this article with
Browser fingerprints are unique signatures generated for a particular user's browser that let you identify browsers across user sessions.
Browser fingerprinting is superior to other identification methods, such as cookies and IP addresses, because it uses vast information about the browser and device it's running on—the operating system, browser version, installed fonts, screen resolution, and hardware configurations—to create a unique final fingerprint using techniques like canvas, WebGL, and audio fingerprinting. Unlike IP addresses and cookies, which can be bypassed using a VPN, using incognito mode, or by clearing cookies, it's almost impossible for the user to change their browser's fingerprint.
In this article, you'll learn how to integrate Fingerprint, a service that generates unique visitor identifiers, into a Svelte application running on SvelteKit to prevent users from registering an excessive number of accounts using the same browser. You'll create and store a visitor ID for each account on registration. When users register a new account, the app will use the visitor ID to determine if the registration comes from a browser belonging to existing users.
Prerequisites
You'll need the latest LTS version of Node.js (v20.11.1 at the time of writing) installed to follow along with the code snippets in this article.
The web app stores user credentials and sessions in a Postgres database, so ensure a Postgres server is running locally. If you have Docker installed, start a temporary Postgres server with the following command:
docker run --name svelte-postgres -p 5432:5432 -e POSTGRES_PASSWORD=verysecurepassword -e POSTGRES_DB=svelte -d postgresThis command starts a Postgres server with the following connection details:
- Host:
localhost - Port:
5432 - Username:
postgres - Password:
verysecurepassword - Database:
svelte
Finally, you'll need a Fingerprint account to run the app. Sign up for a free trial if you don't have one.
Clone the Starter Application
You'll use a starter SvelteKit application template to avoid implementing authentication from scratch.
The template uses Lucia, a popular authentication package compatible with SvelteKit, for its registration and login pages. The application stores user credentials and sessions in a Postgres database using Drizzle ORM. Skeleton and Tailwind are used to style the app's pages and components.
The article will guide you through modifying the registration code to store and check browser fingerprints for each new registration.
Clone the starter template by opening a terminal window and running the following command:
git clone https://github.com/ivankahl/fingerprint-svelte-template.git svelte-fingerprintOnce the template is cloned, navigate into the directory and install the dependencies:
cd svelte-fingerprint
npm i
Open the project directory using your preferred code editor. You'll find SvelteKit's source code in the src folder. The routes subdirectory has login, register, and protected folders. Each folder contains a Svelte page component that gets loaded when the user navigates to that route. For example, if the user navigates to /login, SvelteKit renders the +page.svelte component in the login folder.
Each page can also have server-side logic, which you'll find in the +page.server.ts file. For example, when the form on the login screen is submitted, the server-side endpoint checks the username and password and stores a cookie if the credentials are correct.

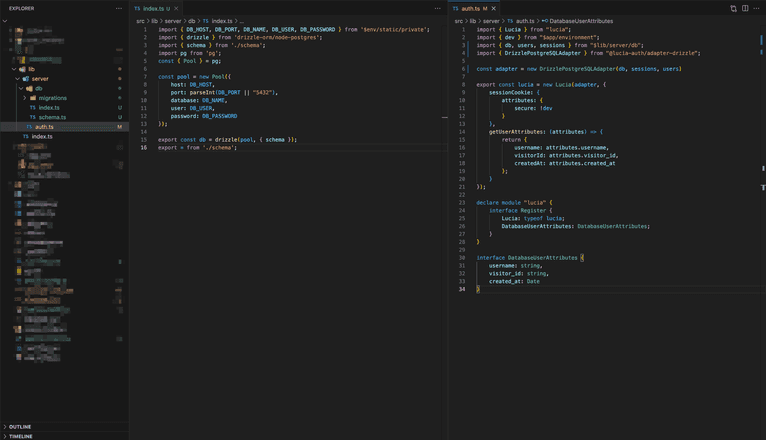
The lib directory contains shared functions and classes. The lib/server/db folder stores logic to manage the database connection using Drizzle ORM. The folder also includes the database schema and a folder of database migrations.
Finally, the lib/server/auth.ts file configures Lucia.
Initialize the Postgres Database
The project contains migration files to create the app's database in Postgres. Drizzle Kit, a migrations tool kit for Drizzle ORM, can apply these migrations to a database. Before applying the migrations, you must configure your app to connect to the database using environment variables.
Create a new file called .env in the project's directory and paste the following code, replacing the placeholders with your database details:
DB_HOST=<YOUR_DB_HOST>
DB_PORT=<YOUR_DB_PORT>
DB_NAME=<YOUR_DB_NAME>
DB_USER=<YOUR_DB_USER>
DB_PASSWORD=<YOUR_DB_PASSWORD>
Run the following command to apply the migrations in the src/lib/server/db/migrations folder to your database:
npm run pushConfigure Fingerprint API Keys
You'll need public and secret API keys to use Fingerprint in your app. The public API key lets your app generate visitor identifiers in the user's browser. The secret API key gets used in the backend to verify the signature hasn't been tampered with.
In the Fingerprint dashboard, click on App Settings in the left menu and then on the API Keys tab.
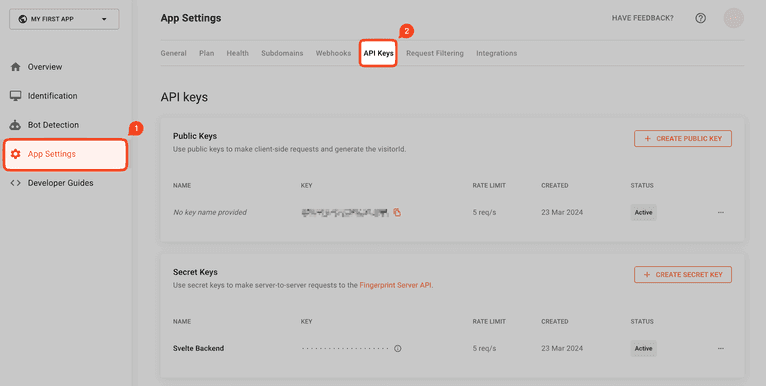
You should see a public API key.
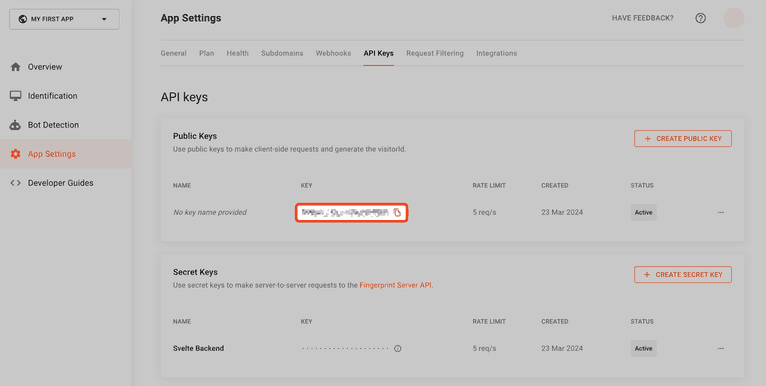
Copy it and paste it at the bottom of the project's .env file:
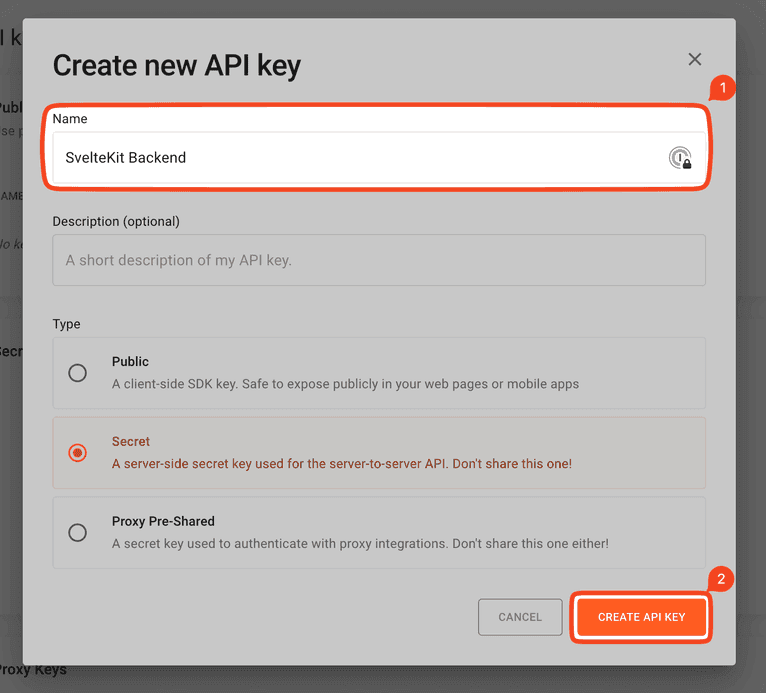
PUBLIC_FINGERPRINT_API_KEY=<PASTE_PUBLIC_API_KEY>Fingerprint doesn't create a secret API key automatically, so go back to the Fingerprint dashboard and click on Create Secret Key:
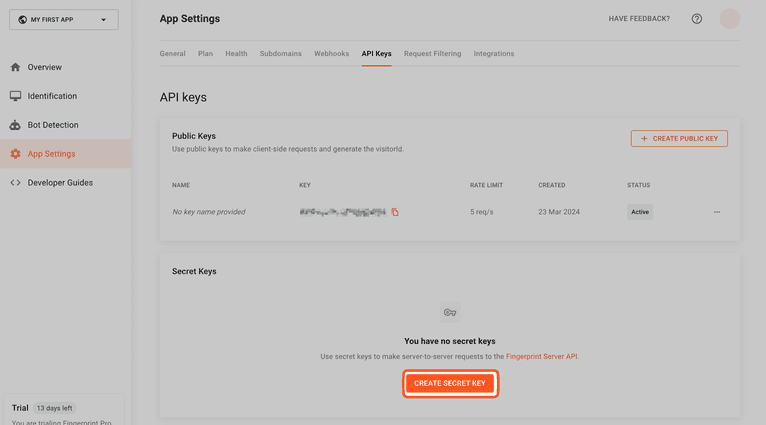
In the modal that appears, enter a name and click on Create API Key:
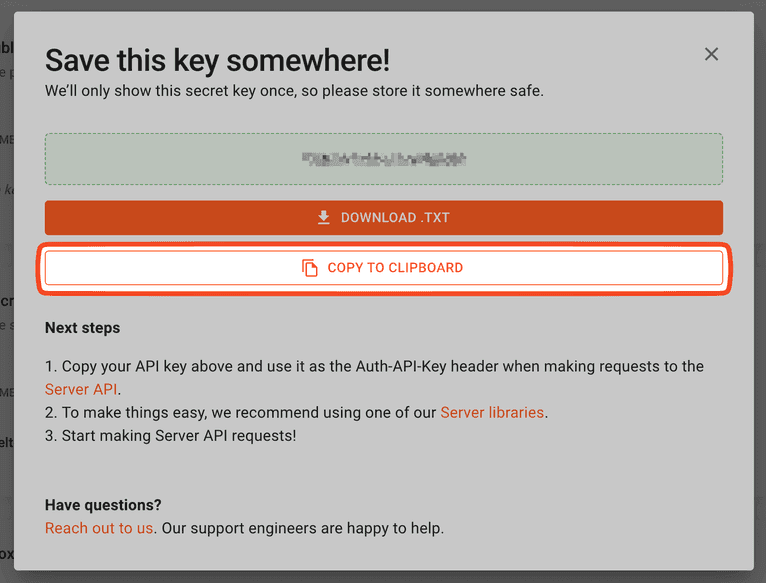
The secret key will appear on the next screen. You won't be able to view it again, so copy the key before closing the modal.
Paste the secret key in your .env file:
SECRET_FINGERPRINT_API_KEY=<PASTE_SECRET_API_KEY>Test your app by starting it with the following command in your terminal:
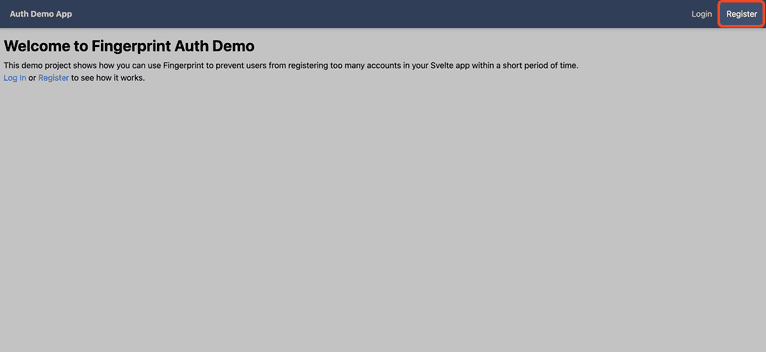
npm run devNavigate to the local URL displayed in the console. You should see a page similar to the one below:
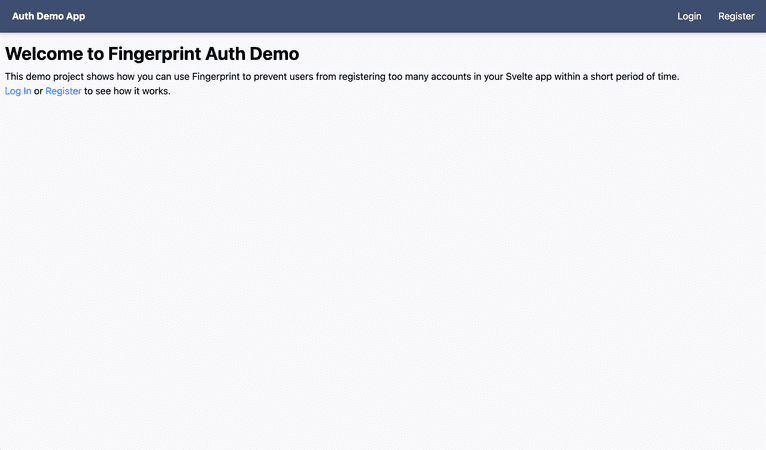
If your app looks like the screenshot above, you're ready to install the Fingerprint libraries and add browser fingerprinting to the registration page.
Using Fingerprint in the Svelte Frontend
Fingerprint uses a client-side JavaScript library to generate browser fingerprints. Install the Fingerprint's client-side package for Svelte using the following command in your terminal:
npm i @fingerprintjs/fingerprintjs-pro-svelteYou'll first need to configure the Fingerprint provider in a parent component. Once the provider is configured, you can retrieve the visitor identifier in any child component. In SvelteKit, an ideal parent component to configure Fingerprint in is the +layout.svelte file since all pages are child components of the layout file.
Open the src/routes/+layout.svelte file and update it to configure the Fingerprint Provider:
<script lang="ts">
    import "tailwindcss/tailwind.css";

    import { PUBLIC_FINGERPRINT_API_KEY } from '$env/static/public';
    import { FpjsProvider } from '@fingerprintjs/fingerprintjs-pro-svelte';
</script>

<FpjsProvider options={{ loadOptions: { apiKey: PUBLIC_FINGERPRINT_API_KEY } }}>
    <slot />
</FpjsProvider>
When you use SvelteKit, public environment variables are imported from the $env/static/public module. In this case, you must import the public API key to configure the FpjsProvider component using the option parameter. The <slot /> is then wrapped in the provider so all pages can access the provider.
With the Fingerprint Provider configured, you can now generate visitor identifiers on the registration page. Open the src/routes/register/+page.svelte file and update the script at the top of the file:
<script lang="ts">
  import { enhance } from "$app/forms";
  import type { ActionData } from "./$types";
  // Import the useVisitorData function from the Fingerprint Pro Svelte package
  import { useVisitorData } from "@fingerprintjs/fingerprintjs-pro-svelte";

  export let form: ActionData;

  // Use the useVisitorData function to get the visitor ID and request ID from Fingerprint
  const { data, getData } = useVisitorData(
    { extendedResult: false, ignoreCache: true },
    { immediate: true }
  );
  getData();

  // Only let the form be submitted if both the visitor and request ID are present
  $: canSubmit = $data?.visitorId && $data.requestId;
</script>

<!-- ... -->
The updated code imports Fingerprint's useVisitorData method and calls the getData() function to identify the visitor. The method is asynchronous, meaning Fingerprint won't return the visitor ID immediately. However, you don't want the user to submit the form before the fingerprint is generated, so the canSubmit Svelte reactive declaration remains false until the visitorId and requestId are available. You'll use this variable to prevent form submission in the next step.
In the same file, update the form with the new code shown below:
<!-- ... -->

<div class="card mx-auto max-w-md mt-12 p-4 spacing-2 drop-shadow-sm">
  <!-- ... -->
  <form method="post" use:enhance class="space-y-2">
    <!-- Email and Password... -->
    <!-- Include the visitorId and requestId in the form submission -->
    <input type="hidden" name="visitorId" value={$data?.visitorId ?? ""} />
    <input type="hidden" name="requestId" value={$data?.requestId ?? ""} />
    <div class="flex items-center gap-3">
      <!-- Make sure the button is only enabled once the visitor and request ID is available-->
      <button
        type="submit"
        class="btn variant-filled-primary"
        disabled="{!canSubmit}"
      >
        Register
      </button>
      <span class="text-primary-300">
        or <a href="/login" class="text-primary-500">Log In</a></span
      >
    </div>
  </form>
</div>
This snippet adds two new hidden inputs to the form, which are bound to the visitorId and requestId values returned by Fingerprint. The Register button is also disabled using the canSubmit variable so users can't submit the form until both the visitorId and requestId are available.
And that completes your frontend! In the next sections, you'll modify the backend to validate registrations using the visitor ID before creating accounts.
Add the Visitor ID to the Database
Before using the visitor ID server-side, create a field in the database to store the visitorId for each user by opening the src/lib/server/db/schema.ts file and adding a visitorId field to the users table:
// ...

export const users = pgTable("user", {
  // ...
  visitorId: text("visitor_id").notNull(),
});

// ...
To add the field to your existing Postgres database, create a migration and apply it using the following commands:
npm run generate
npm run push
The first command generates a migration file for the new field, which you'll find in the src/lib/server/db/migrations directory. The second applies that migration to your Postgres database.
Verify the Visitor ID
Fingerprint provides a Node.js npm package to access its SDK. Install it by running the following command in your terminal:
npm i @fingerprintjs/fingerprintjs-pro-server-apiOnce that package is installed, open the src/routes/register/+page.server.ts file. This file contains a default action that runs when the user submits the registration form. You'll write a couple of validation functions and call them from the default action as part of the registration flow.
First, retrieve the visitorId and requestId from the form data.:
// ...
export const actions: Actions = {
  default: async (event) => {
    const formData = await event.request.formData();
    const email = formData.get("email");
    const password = formData.get("password");
    // Retrieve the visitorId and requestId form values
    const visitorId = formData.get("visitorId");
    const requestId = formData.get("requestId");

    // ...

    // Validate that the visitorId and requestId are present and are strings
    if (!visitorId || !requestId) {
      return fail(400, {
        message: "Please turn off any ad blockers and try again.",
      });
    }

    const userExists = await checkUserExists(email);
    // ...
  },
};
// ...
Next, you'll use the Fingerprint SDK to perform additional checks. Paste the following function below the checkUserExists function in the same file:
// ...
import {
  FingerprintJsServerApiClient,
  Region,
} from "@fingerprintjs/fingerprintjs-pro-server-api";
import { SECRET_FINGERPRINT_API_KEY } from "$env/static/private";

// ...

async function checkUserExists(email: string): Promise<ValidationCheckResult> {
  // ...
}

/**
 * Verifies the visitor ID and request ID using the Fingerprint API. This includes
 * checking that the visitorId belongs to the requestId, that the requestId is not
 * older than 2 minutes, and that the confidence score is above 0.9.
 * @param visitorId The user's Fingerprint Visitor ID
 * @param requestId The request ID from Fingerprint
 * @returns An error if the visitor ID is invalid, otherwise void
 */
async function verifyVisitorId(
  visitorId: string,
  requestId: string
): Promise<ValidationCheckResult> {
  const client = new FingerprintJsServerApiClient({
    apiKey: SECRET_FINGERPRINT_API_KEY,
    region: Region.Global,
  });

  const eventData = await client.getEvent(requestId);
  const identification = eventData.products?.identification?.data;

  if (!identification) {
    return fail(400, {
      message: "Invalid identification data.",
    });
  }

  // If the visitor IDs don't match, return an error
  if (identification.visitorId !== visitorId) {
    return fail(400, {
      message: "Forged Visitor ID.",
    });
  }

  // Make sure the identification is not older than 2 minutes
  if (
    new Date(identification.timestamp) < new Date(Date.now() - 1000 * 60 * 2)
  ) {
    return fail(400, {
      message: "Expired identification timestamp.",
    });
  }

  // Make sure the confidence score is above 0.9
  if (identification.confidence.score < 0.9) {
    return fail(400, {
      message: "Low confidence identification score.",
    });
  }
}
The code snippet first imports the FingerprintJsServerApiClient and Region classes, which you'll use to interact with the Fingerprint SDK. The secret API Key is also imported from SvelteKit's $env/static/private module. The verifyVisitorId initializes the FingerprintJsServerApiClient using the environment variable and gets information about the requestId using the getEvent method.
If the result is valid, the method compares the visitorId returned by the Fingerprint SDK and the visitorId submitted in the form. If they don't match, the visitorId submitted was tampered with, and the method returns an error to the user. If the visitor IDs match, the code ensures the requestId is not older than two minutes. Checking the timestamp prevents users from using an old visitorId and requestId. Finally, the code ensures the confidence score is at least 90 percent.
Update the default action to include a call to this method:
// ...
export const actions: Actions = {
  default: async (event) => {
    const formData = await event.request.formData();
    // ...

    const userExists = await checkUserExists(email);
    if (userExists) return userExists;

    // Use the Fingerprint API to verify the visitorId and requestId
    const validVisitorAndRequestId = await verifyVisitorId(
      visitorId,
      requestId
    );
    if (validVisitorAndRequestId) return validVisitorAndRequestId;

    // ...
  },
};
// ...
Use the Visitor ID to Prevent Excessive Registrations
Now that you're confident that the submitted visitorId is accurate, you'll use it to look for users in the database with the same visitor ID. Add the following method below the verifyVisitorId method:
// ...
import { eq, and, gt } from "drizzle-orm";

// ...
async function verifyVisitorId(
  visitorId: string,
  requestId: string
): Promise<ValidationCheckResult> {
  // ...
}

/**
 * Checks if the user has registered more than 5 accounts from the same browser in the last 7 days.
 * @param visitorId The user's Fingerprint Visitor ID
 * @returns An error if the user has registered too many accounts from the same browser, otherwise void
 */
async function checkUsersRegisteredForBrowser(
  visitorId: string
): Promise<ValidationCheckResult> {
  // Get Date object for seven days ago
  const sevenDaysAgo = new Date(Date.now() - 1000 * 60 * 60 * 24 * 7);

  // Query the users table for any users created in the last 7 days
  // with the same visitor ID
  const existingUsers = await db
    .select()
    .from(users)
    .where(
      and(eq(users.visitorId, visitorId), gt(users.createdAt, sevenDaysAgo))
    );

  // If the user has registered more than 5 accounts in the last 7 days, return an error
  if (existingUsers.length >= 5) {
    return fail(400, {
      message: "You cannot register any more accounts from this browser.",
    });
  }
}
// ...
The method uses Drizzle ORM to query the users table for any user accounts with the same visitor ID created in the last seven days. If the user has registered five or more accounts during the past week, an error message informs them that they cannot register another account from their browser.
Call this validation method right after the call to the verifyVisitorId method in the action:
// ...
export const actions: Actions = {
  default: async (event) => {
    // ...

    // Use the Fingerprint API to verify the visitorId and requestId
    const validVisitorAndRequestId = await verifyVisitorId(
      visitorId,
      requestId
    );
    if (validVisitorAndRequestId) return validVisitorAndRequestId;

    // Use the visitorId to check if the user has registered too many accounts from the same browser
    const browserLimitReached = await checkUsersRegisteredForBrowser(visitorId);
    if (browserLimitReached) return browserLimitReached;

    // ...
  },
};
// ...
Finally, update the code that creates the new user in the database to include the visitor ID by adding the visitorId to the registerUser method at the bottom of the file:
/**
 * Registers a new user in the database.
 * @param email The email address of the new user registering
 * @param password The password of the new user registering
 * @param visitorId The user's Fingerprint Visitor ID
 * @returns The ID of the newly registered user
 */
async function registerUser(
  email: string,
  password: string,
  visitorId: string
): Promise<string> {
  const userId = generateId(15);
  const hashedPassword = await new Argon2id().hash(password);

  await db.insert(users).values({
    id: userId,
    username: email,
    hashedPassword: hashedPassword,
    createdAt: new Date(),
    // Add the visitor ID to the user record
    visitorId: visitorId,
  });

  return userId;
}
Update the call to the registerUser method in the action to pass the submitted visitorId:
// ...
export const actions: Actions = {
  default: async (event) => {
    // ...
    const userId = await registerUser(email, password, visitorId);
    // ...
  },
};
// ...
Your final src/routes/register/+page.server.ts file should look like this.
Test the Web App
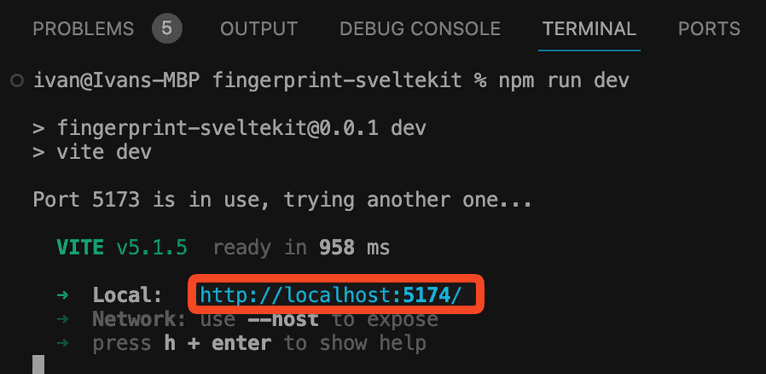
Run your web app and test the registration using the following command in your terminal:
npm run devThe app URL will appear in the terminal.
Open the URL in your browser and click on the Register link in the top menu.
Register an account using the form. Once you submit, the app will redirect you to the /protected page. Log out and register a few more users to test the fingerprint logic. Once you've registered five users, you'll see an error like the one below:

Congratulations! You've successfully implemented browser fingerprinting in a Svelte app to prevent users from registering too many accounts. You can find the final source code for this project on GitHub.
Conclusion
Some users try to exploit usage restrictions in your service by registering multiple accounts. Fortunately, you can make it much harder to do so using browser fingerprinting.
This article showed you how to integrate Fingerprint’s visitor identifiers in your Svelte app frontend. You also saw how to use the Fingerprint SDK in the backend to verify that the visitor ID has not been tampered with before storing and using it.
Fingerprint lets you integrate browser fingerprinting into your website for improved security and personalized customer experiences. It provides libraries and packages for several frontend and backend frameworks and programming languages, making it easy to implement in almost any technology stack. Sign up for a free trial to try it out.
FAQ
Browser fingerprinting is a method to uniquely identify website users by analyzing details about their web browsers to generate an identifier. This information can include details like browser version, screen resolution, and installed fonts to uniquely identify a user's device.
Adding browser fingerprinting to your app can enhance security by detecting and preventing fraudulent activities. It can also be used to improve user experience by enabling personalized settings without requiring logins.
Browser fingerprinting provides a much more persistent form of visitor identification than cookies, which users can easily clear or block. It allows for effective identification and fraud detection capabilities even with stricter privacy settings and cookie restrictions.


